
Assets
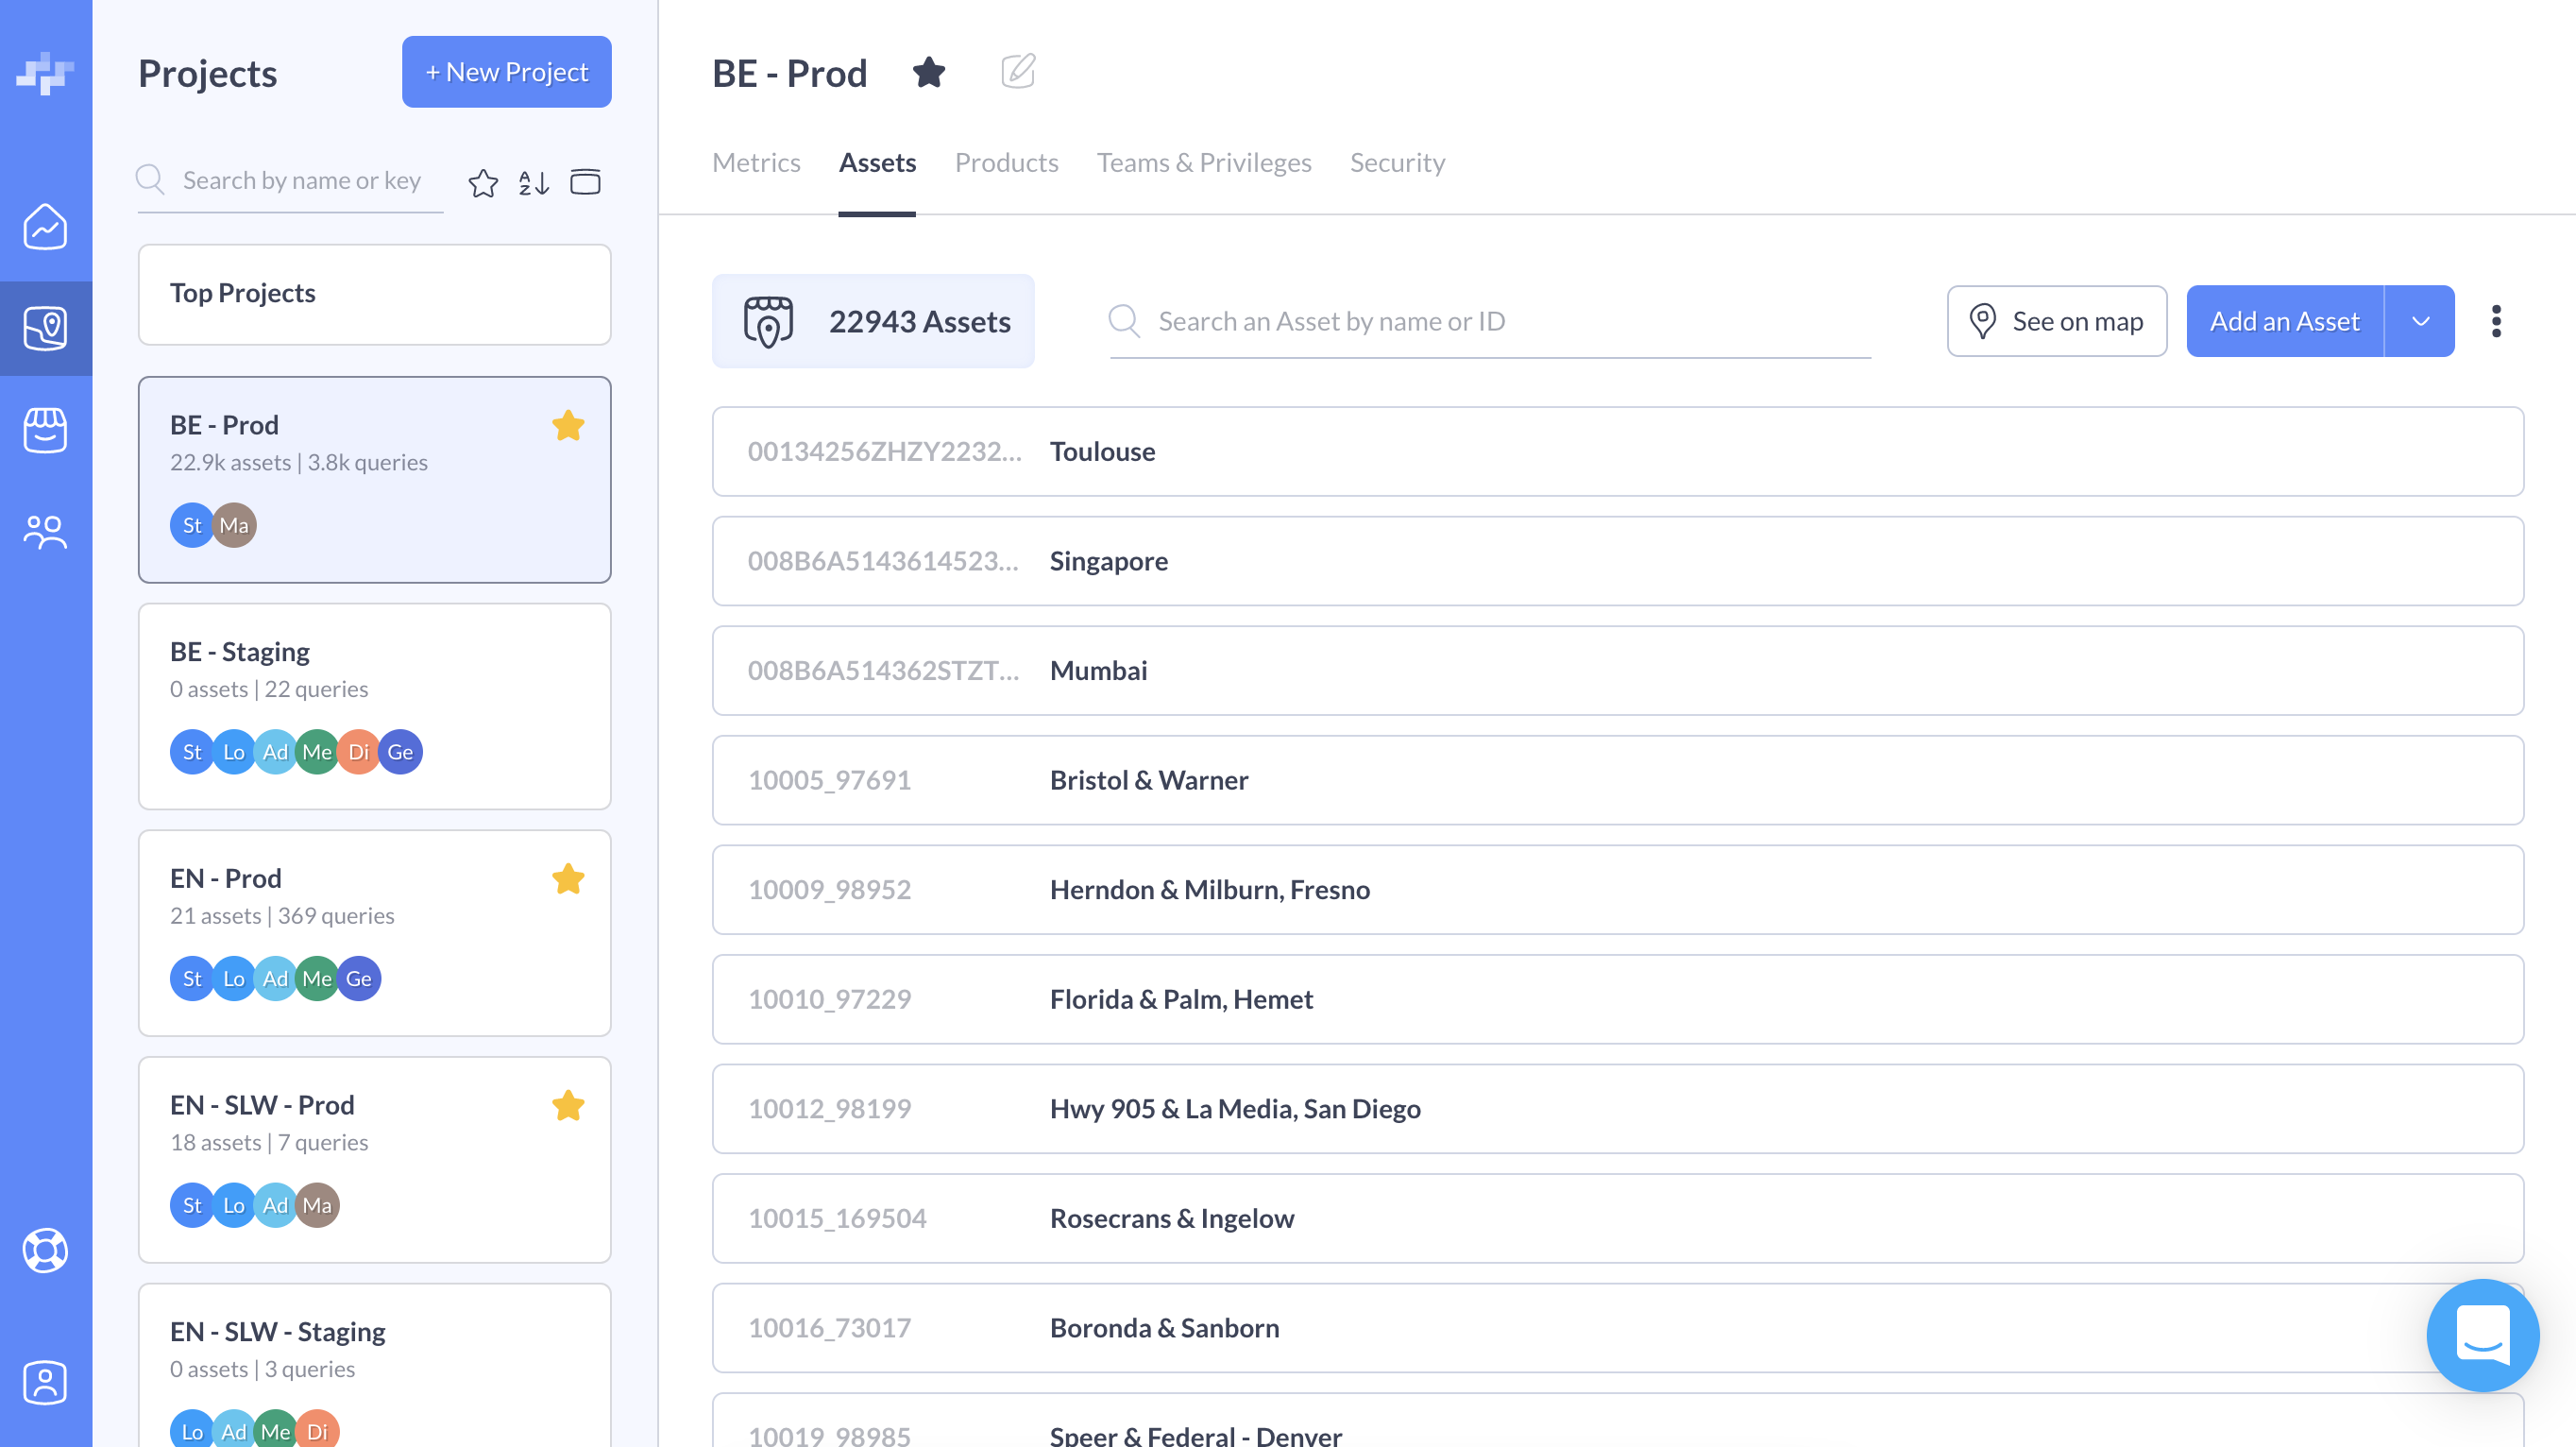
Before we start telling you all theres to know about the Assets, we thought it would be clever to quickly define the concept. There it is:
"An Asset is commonly known as a point of interest (store, restaurant, agency, etc.) to be displayed on a Woosmap Store Locator."
In the Assets section, in addition to uploading new Assets you can:
- edit a chosen Asset data
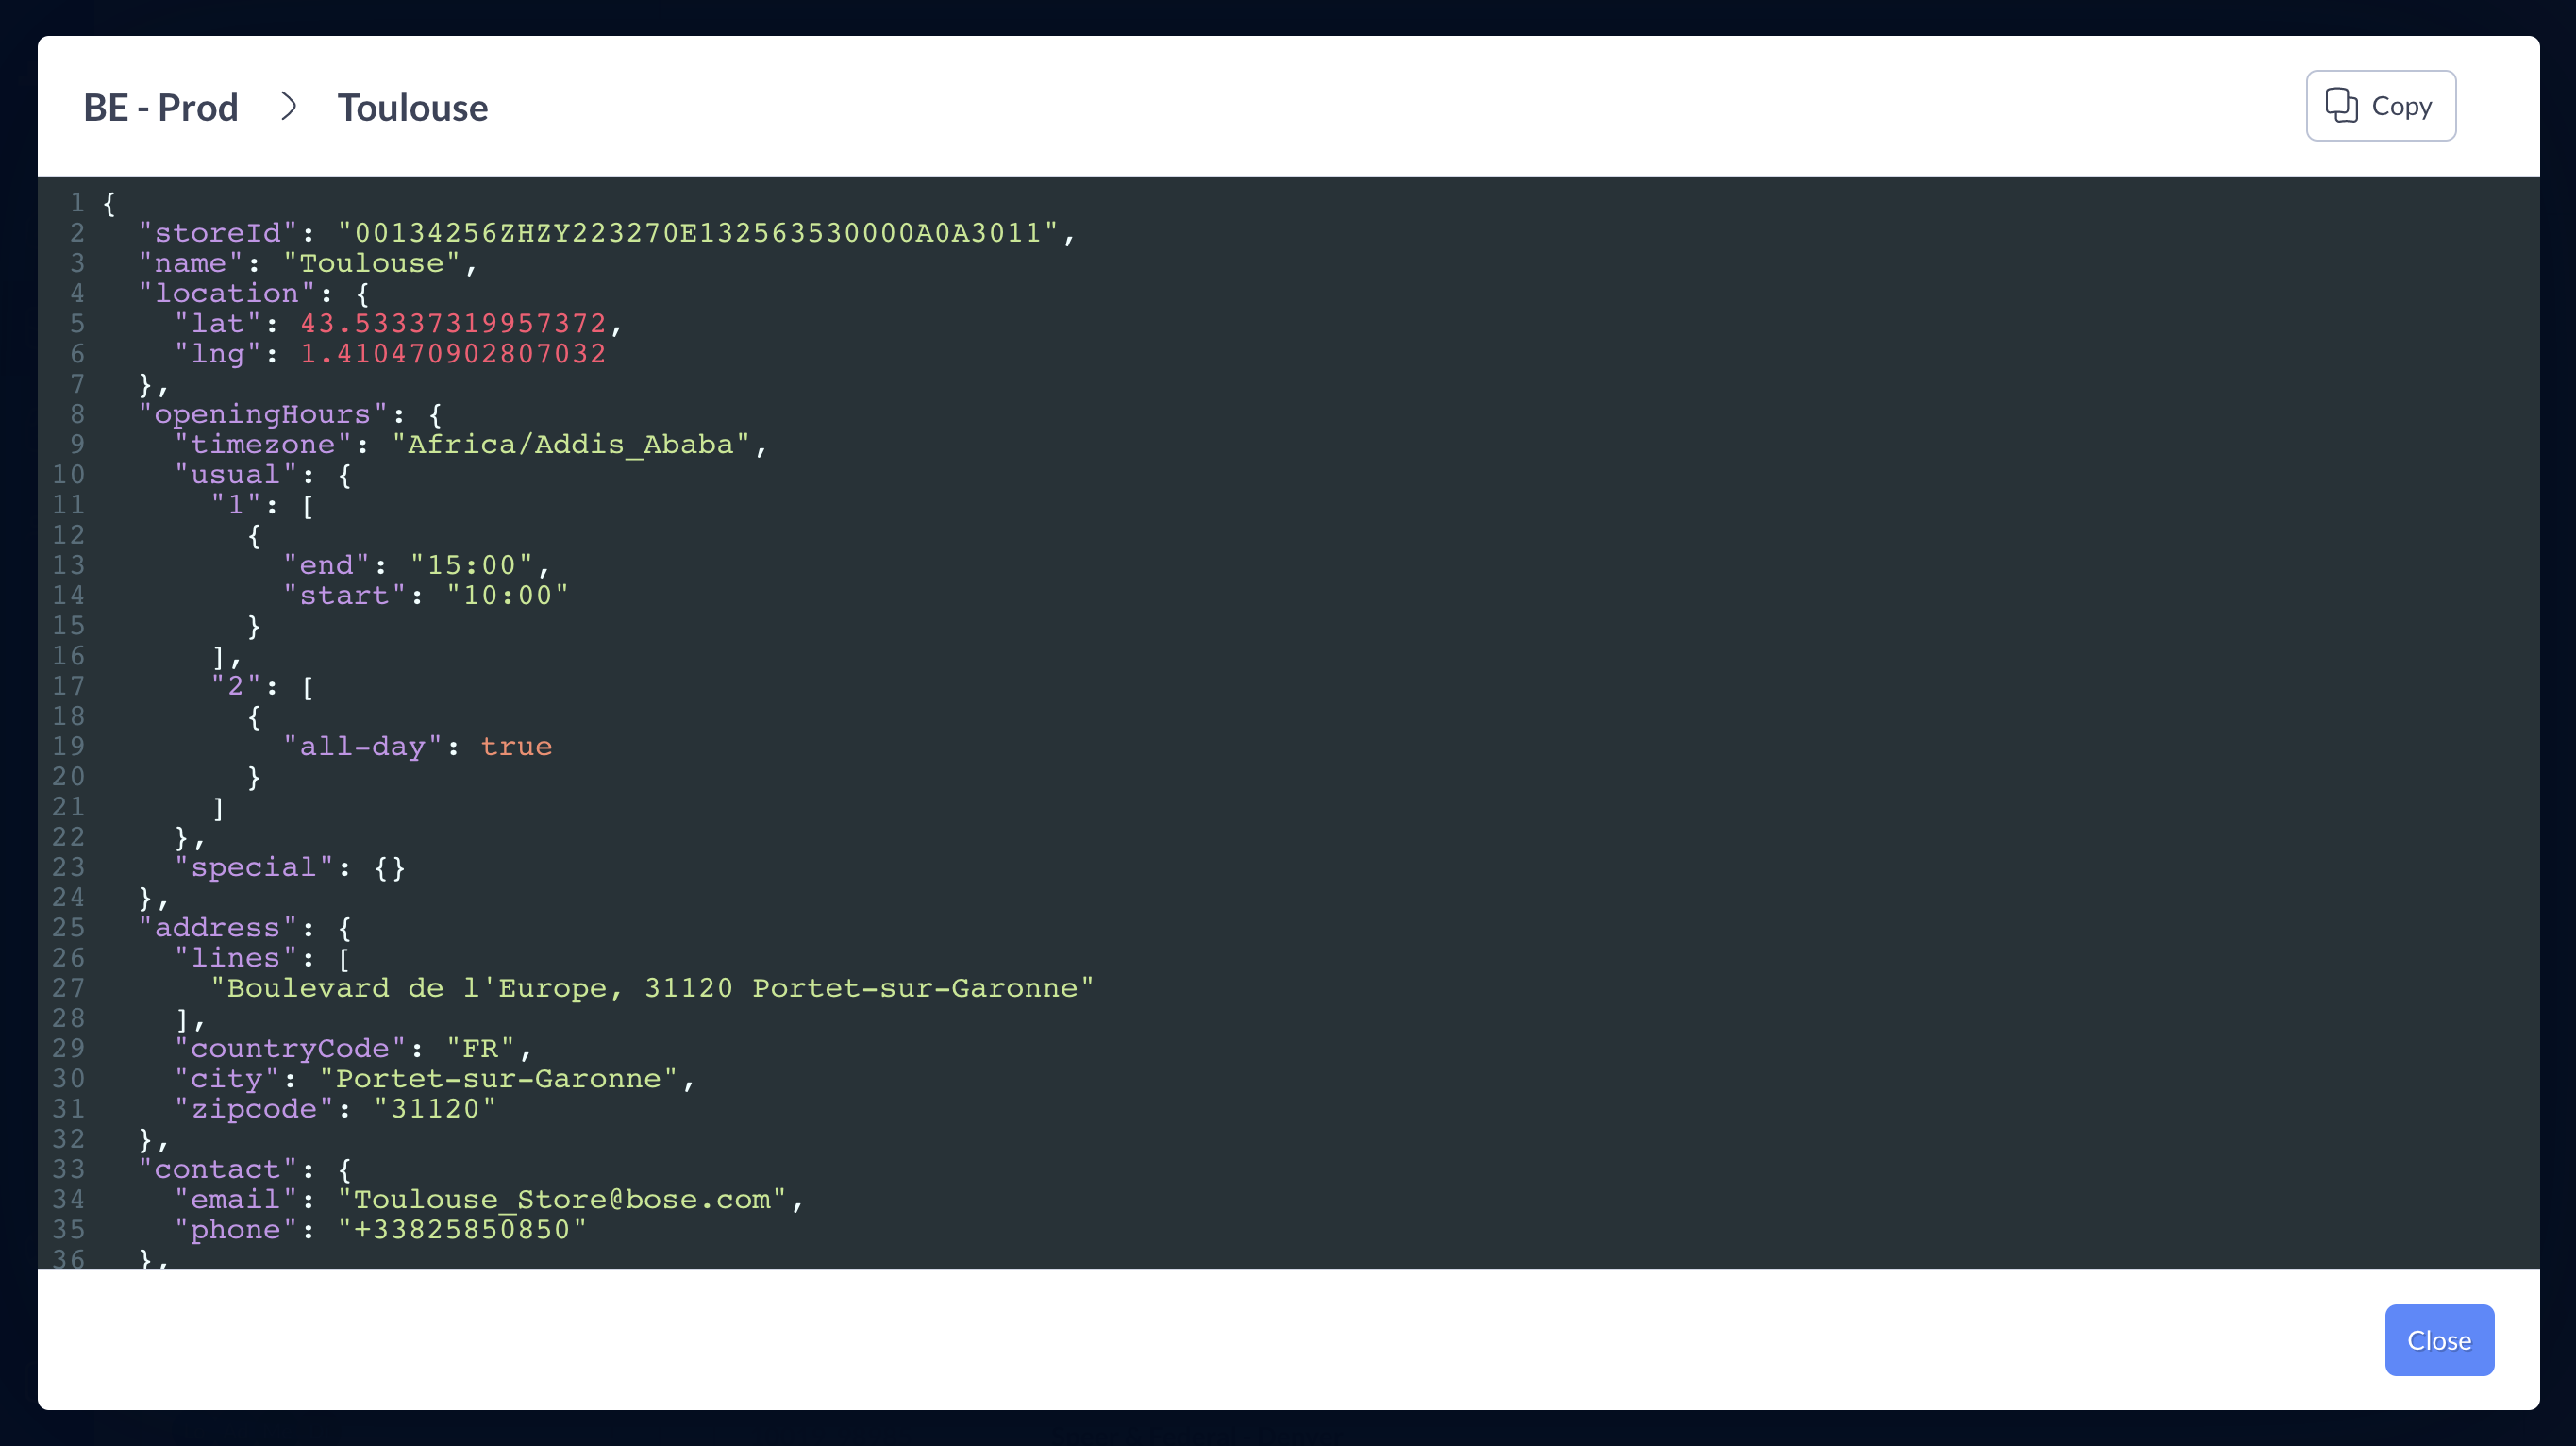
- visualize an Asset's json file
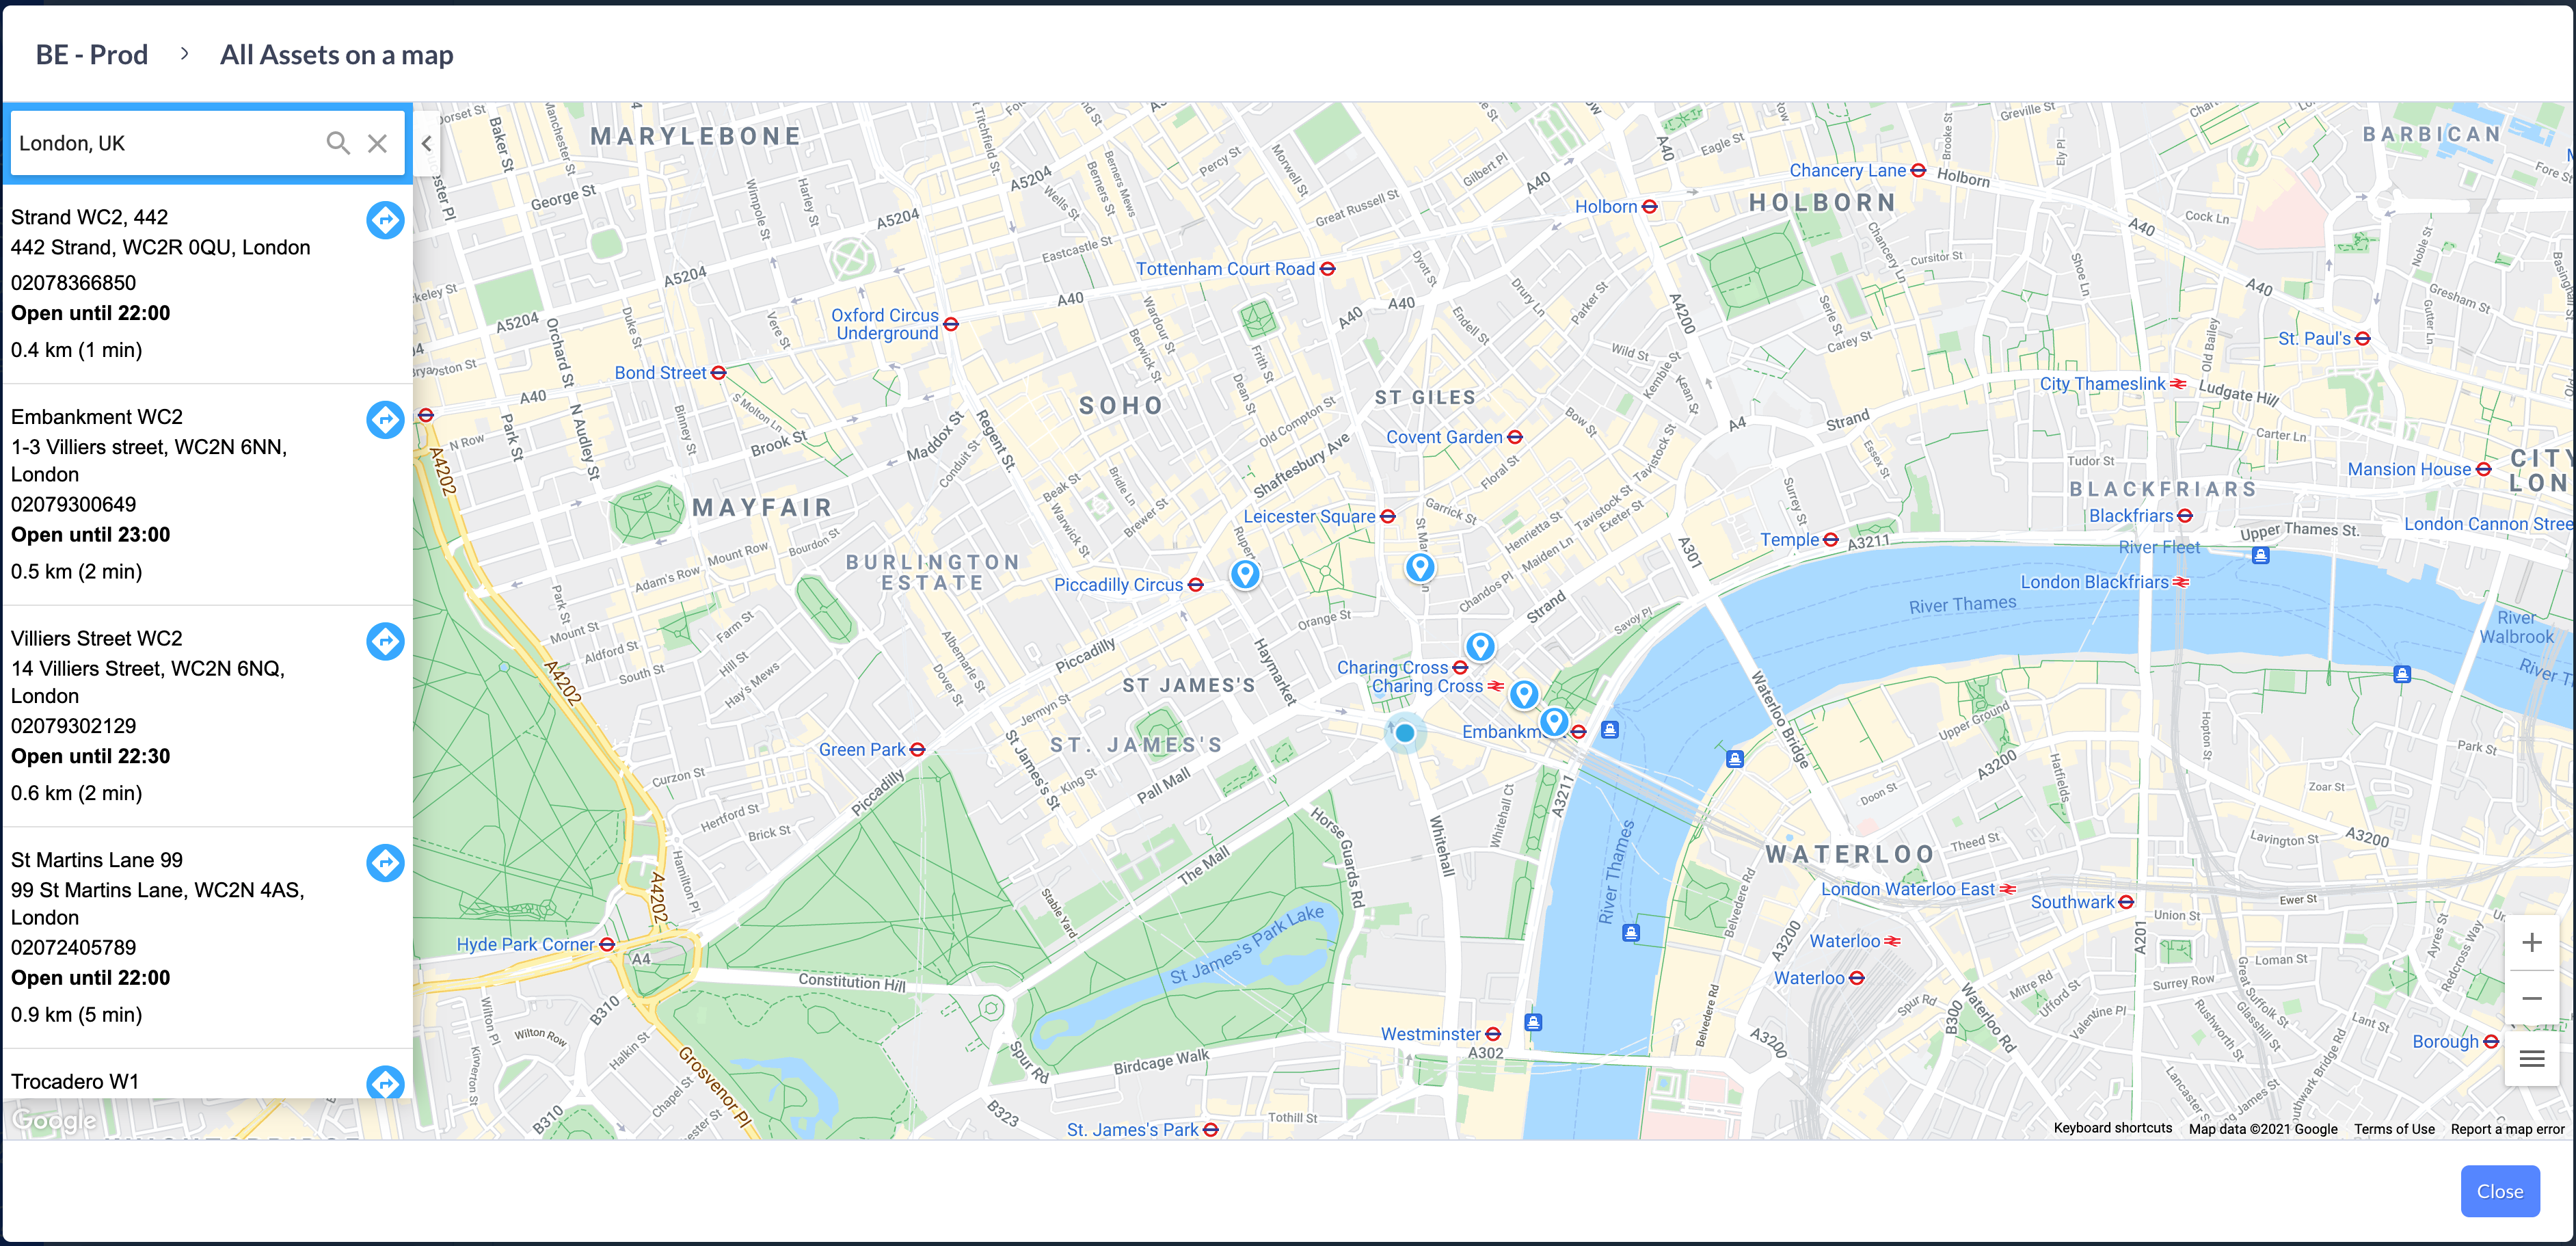
- see all your Assets on a
Woosmap Store Locatorwith the "See on map"

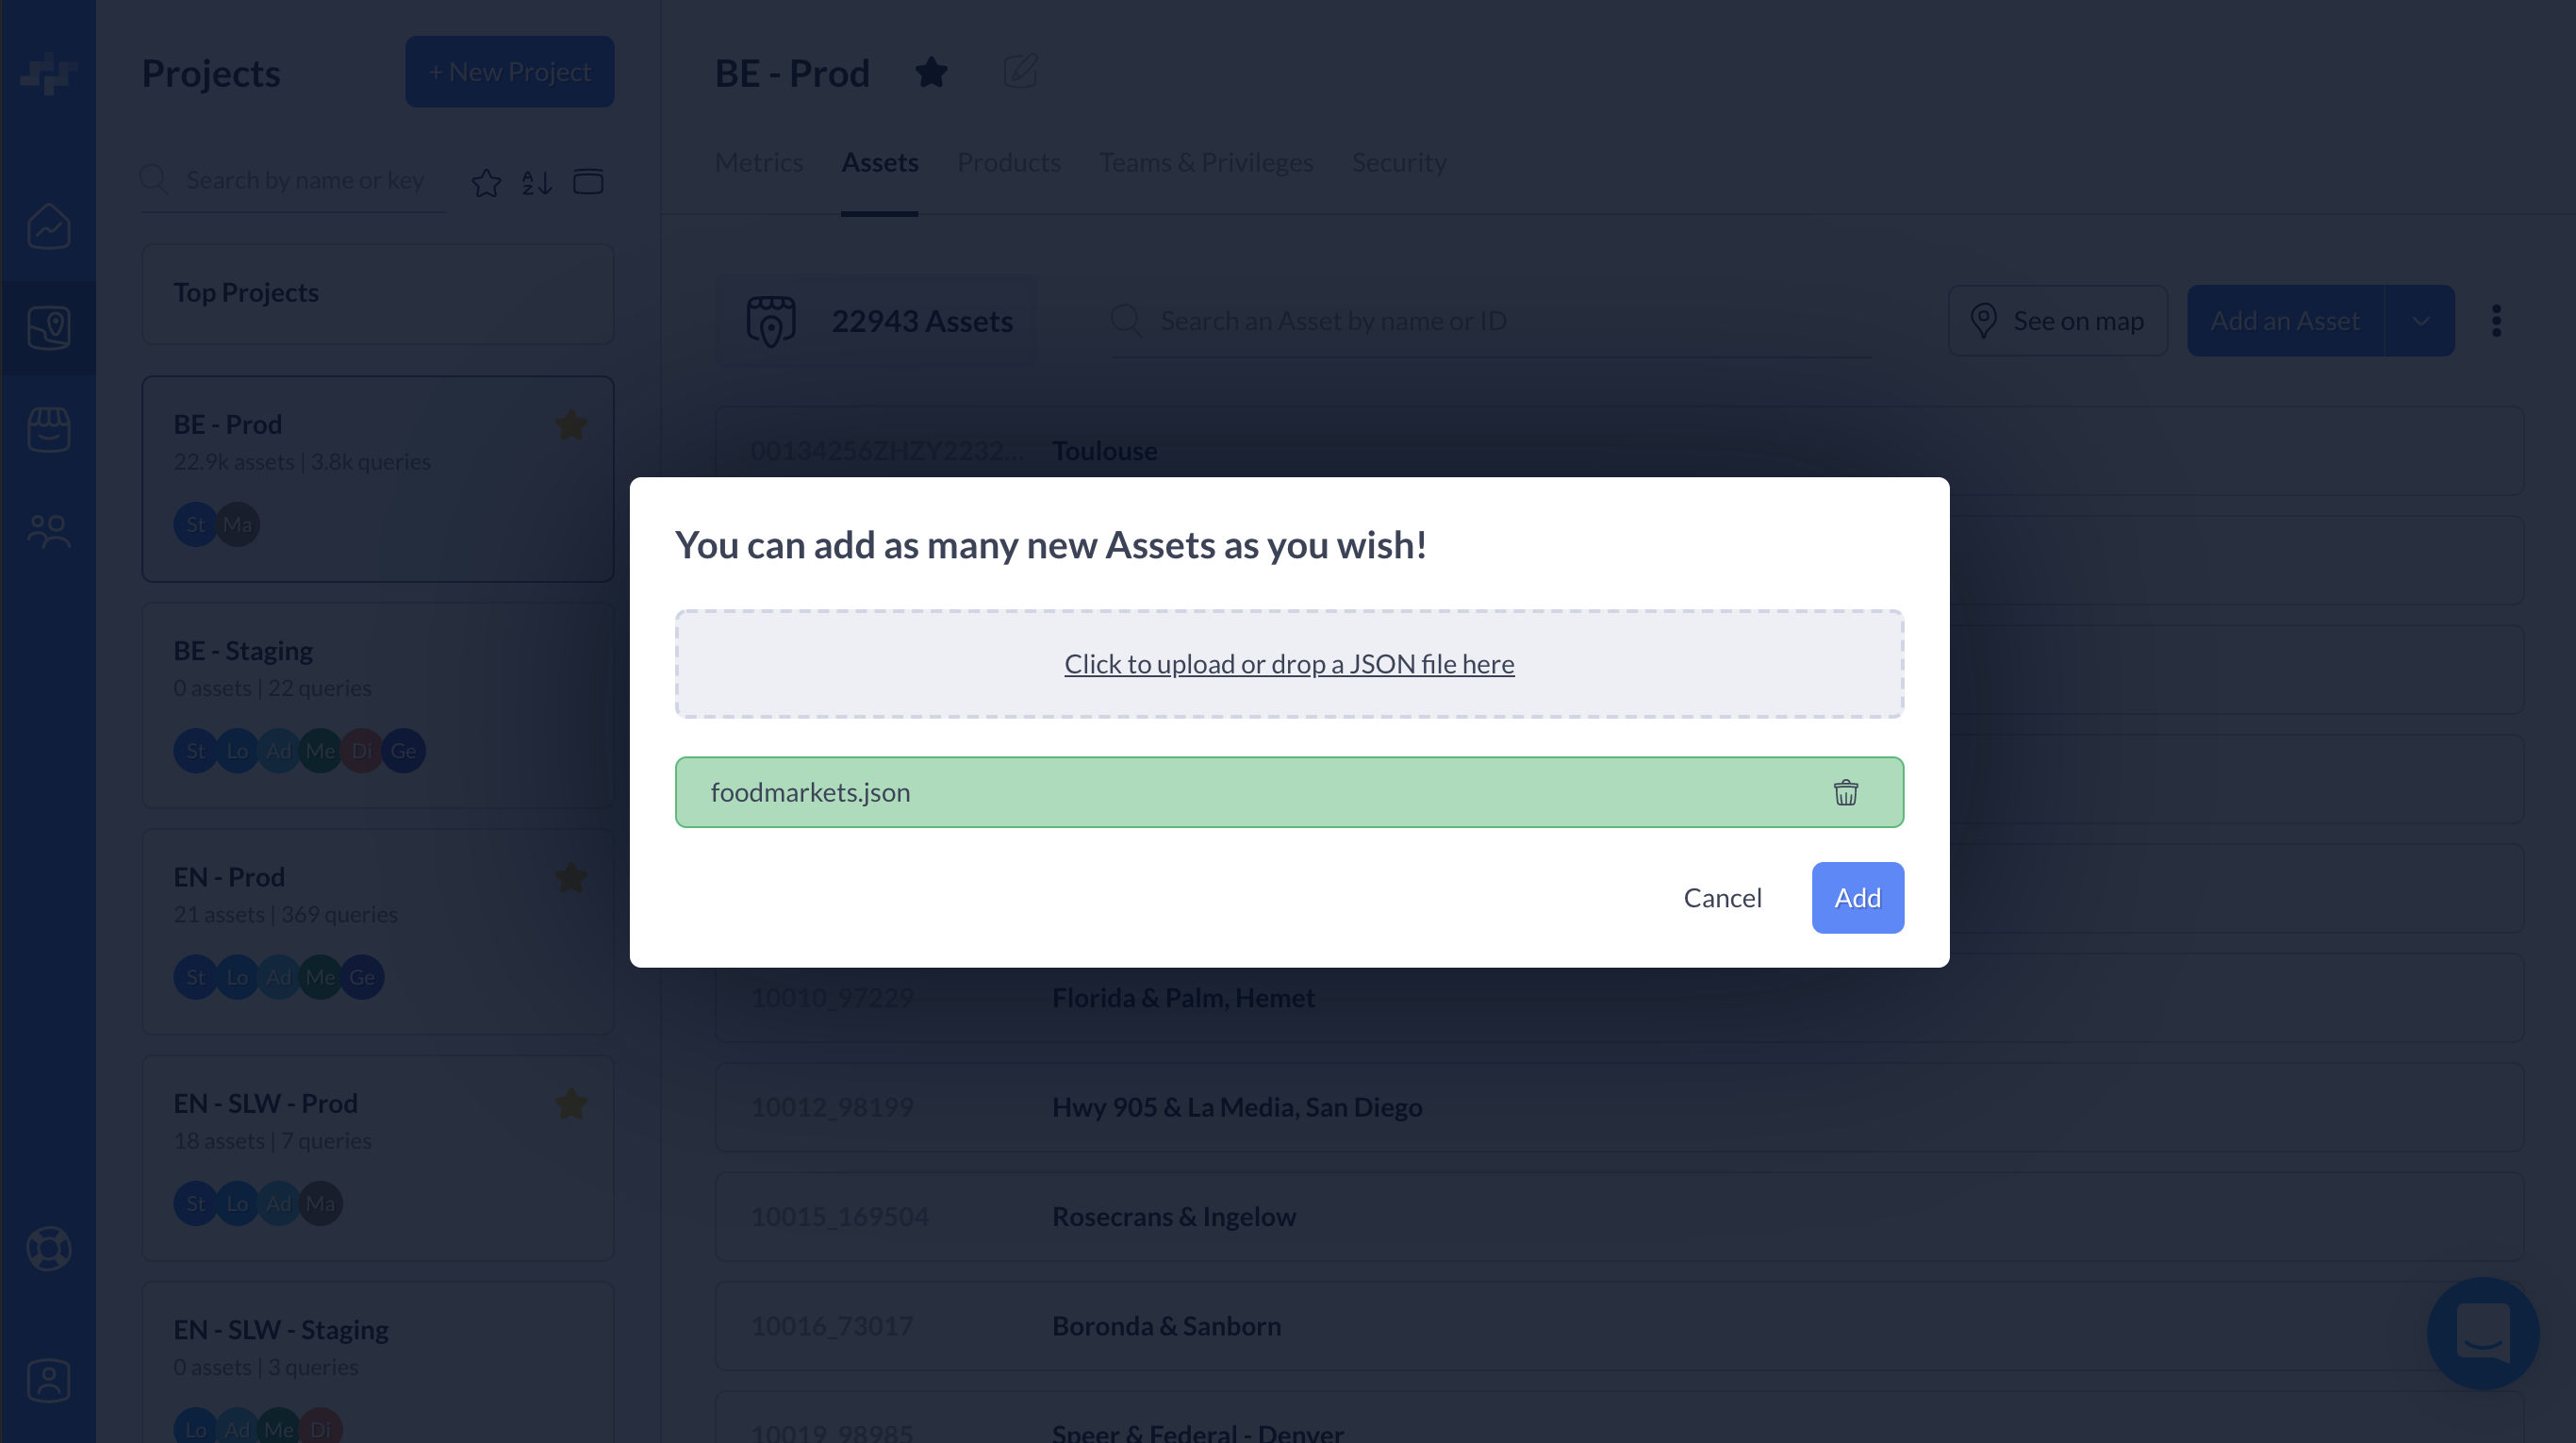
- upload new Assets or update existing ones using a json file
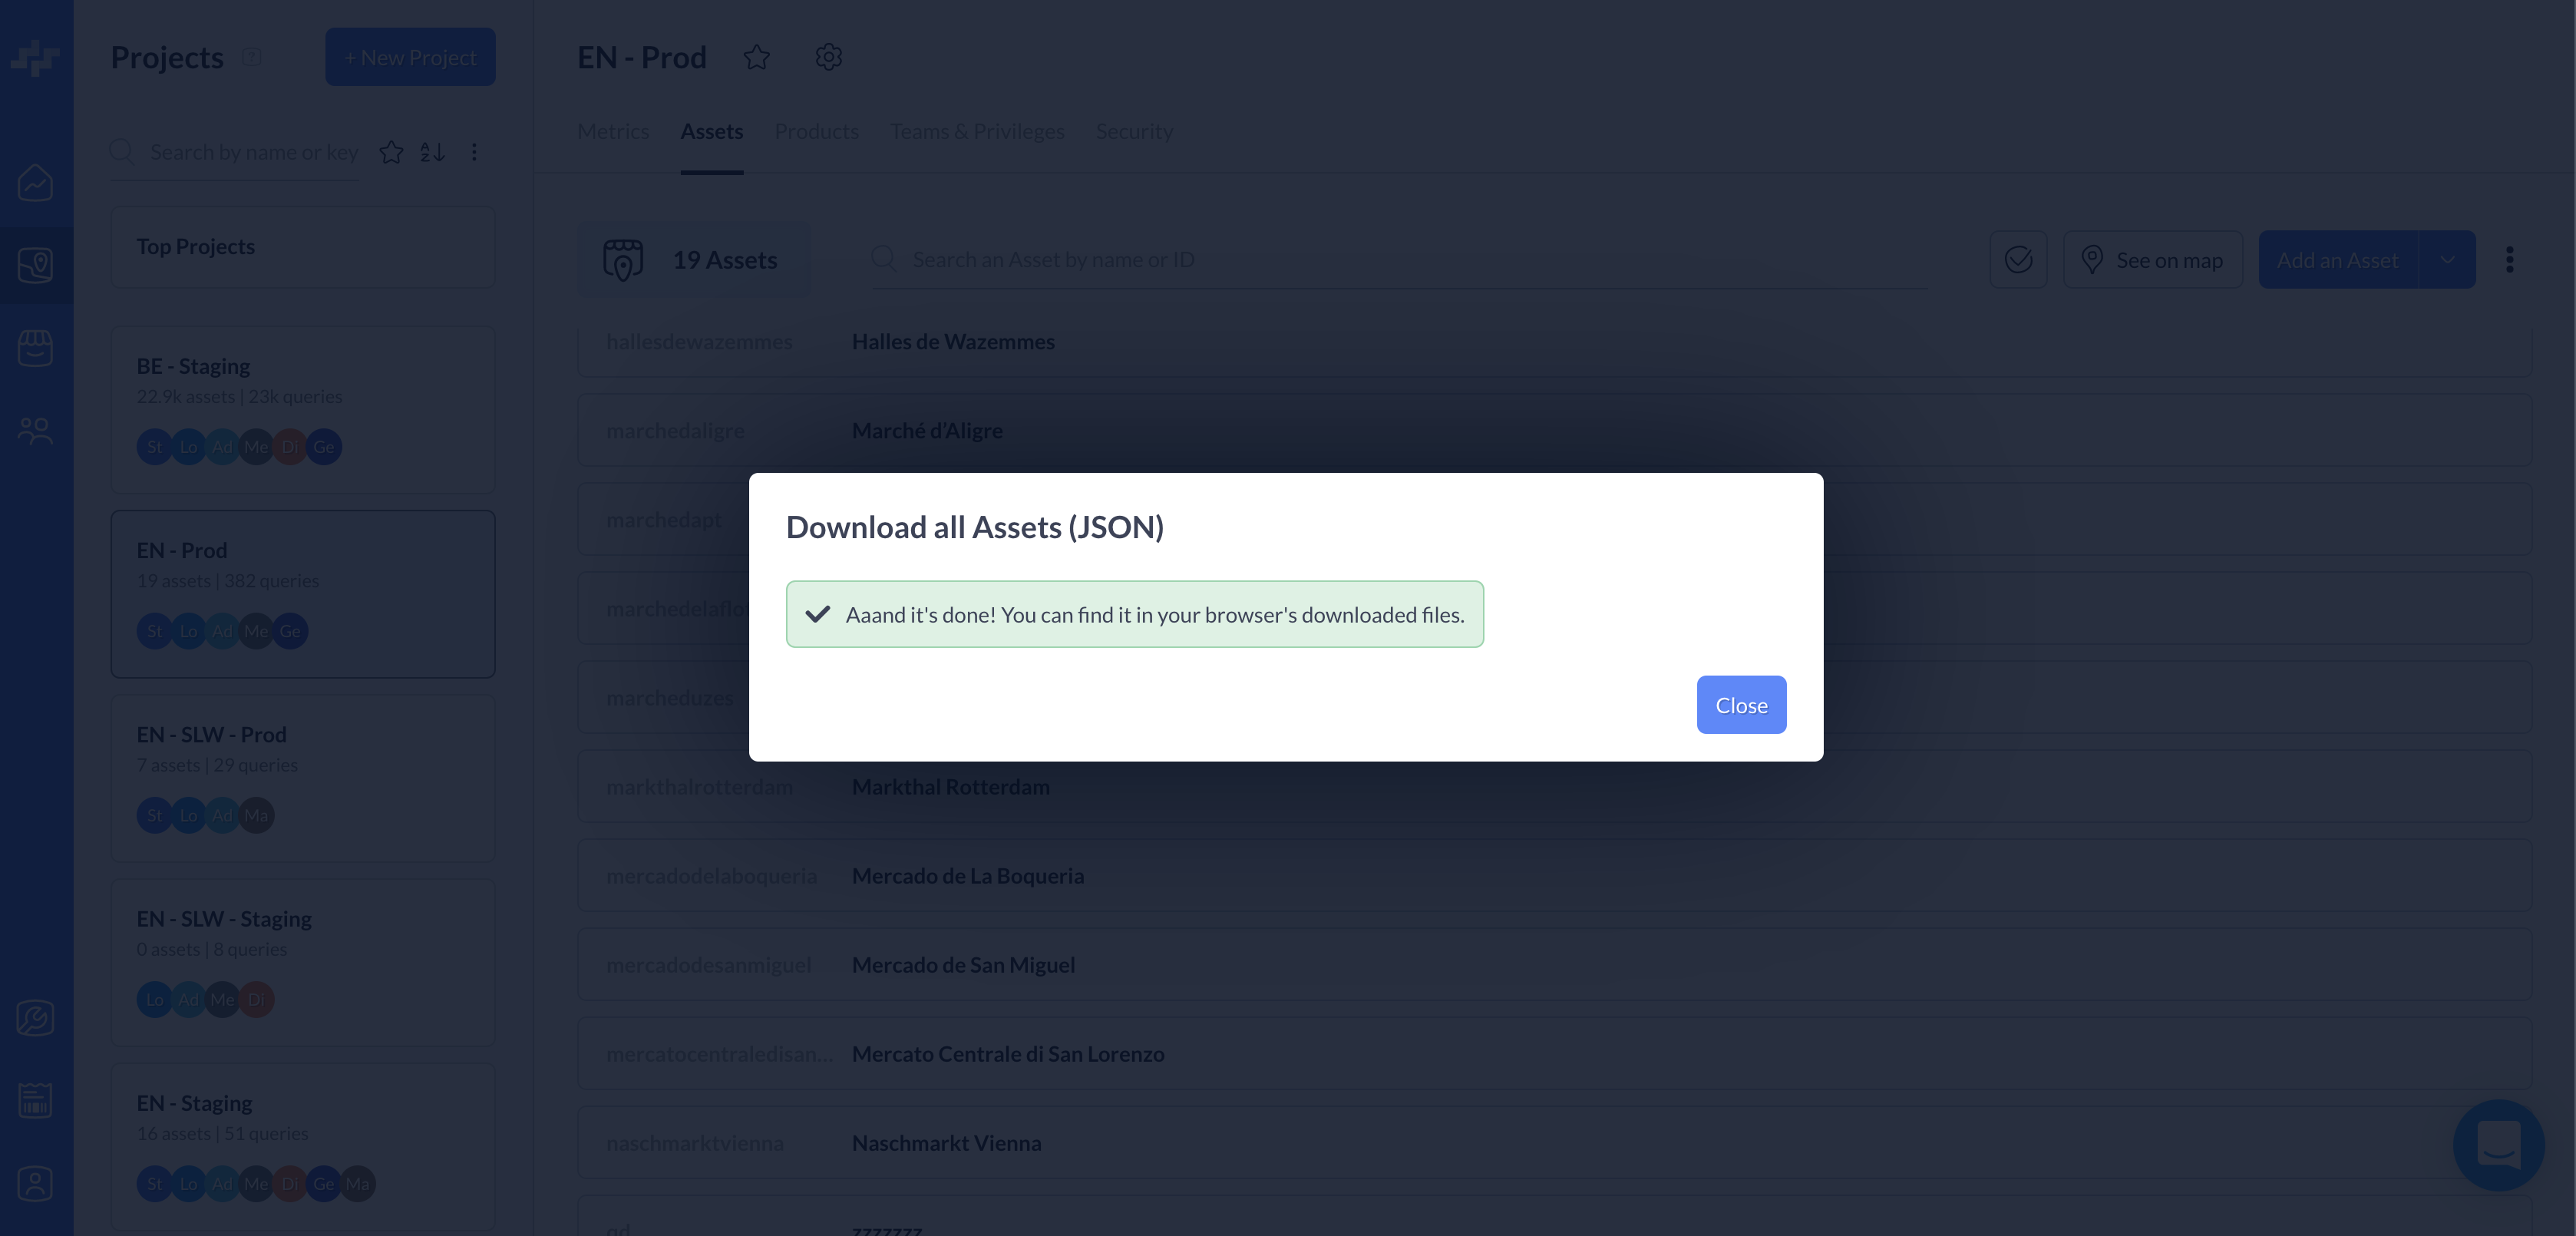
- downloading all Assets as a json file
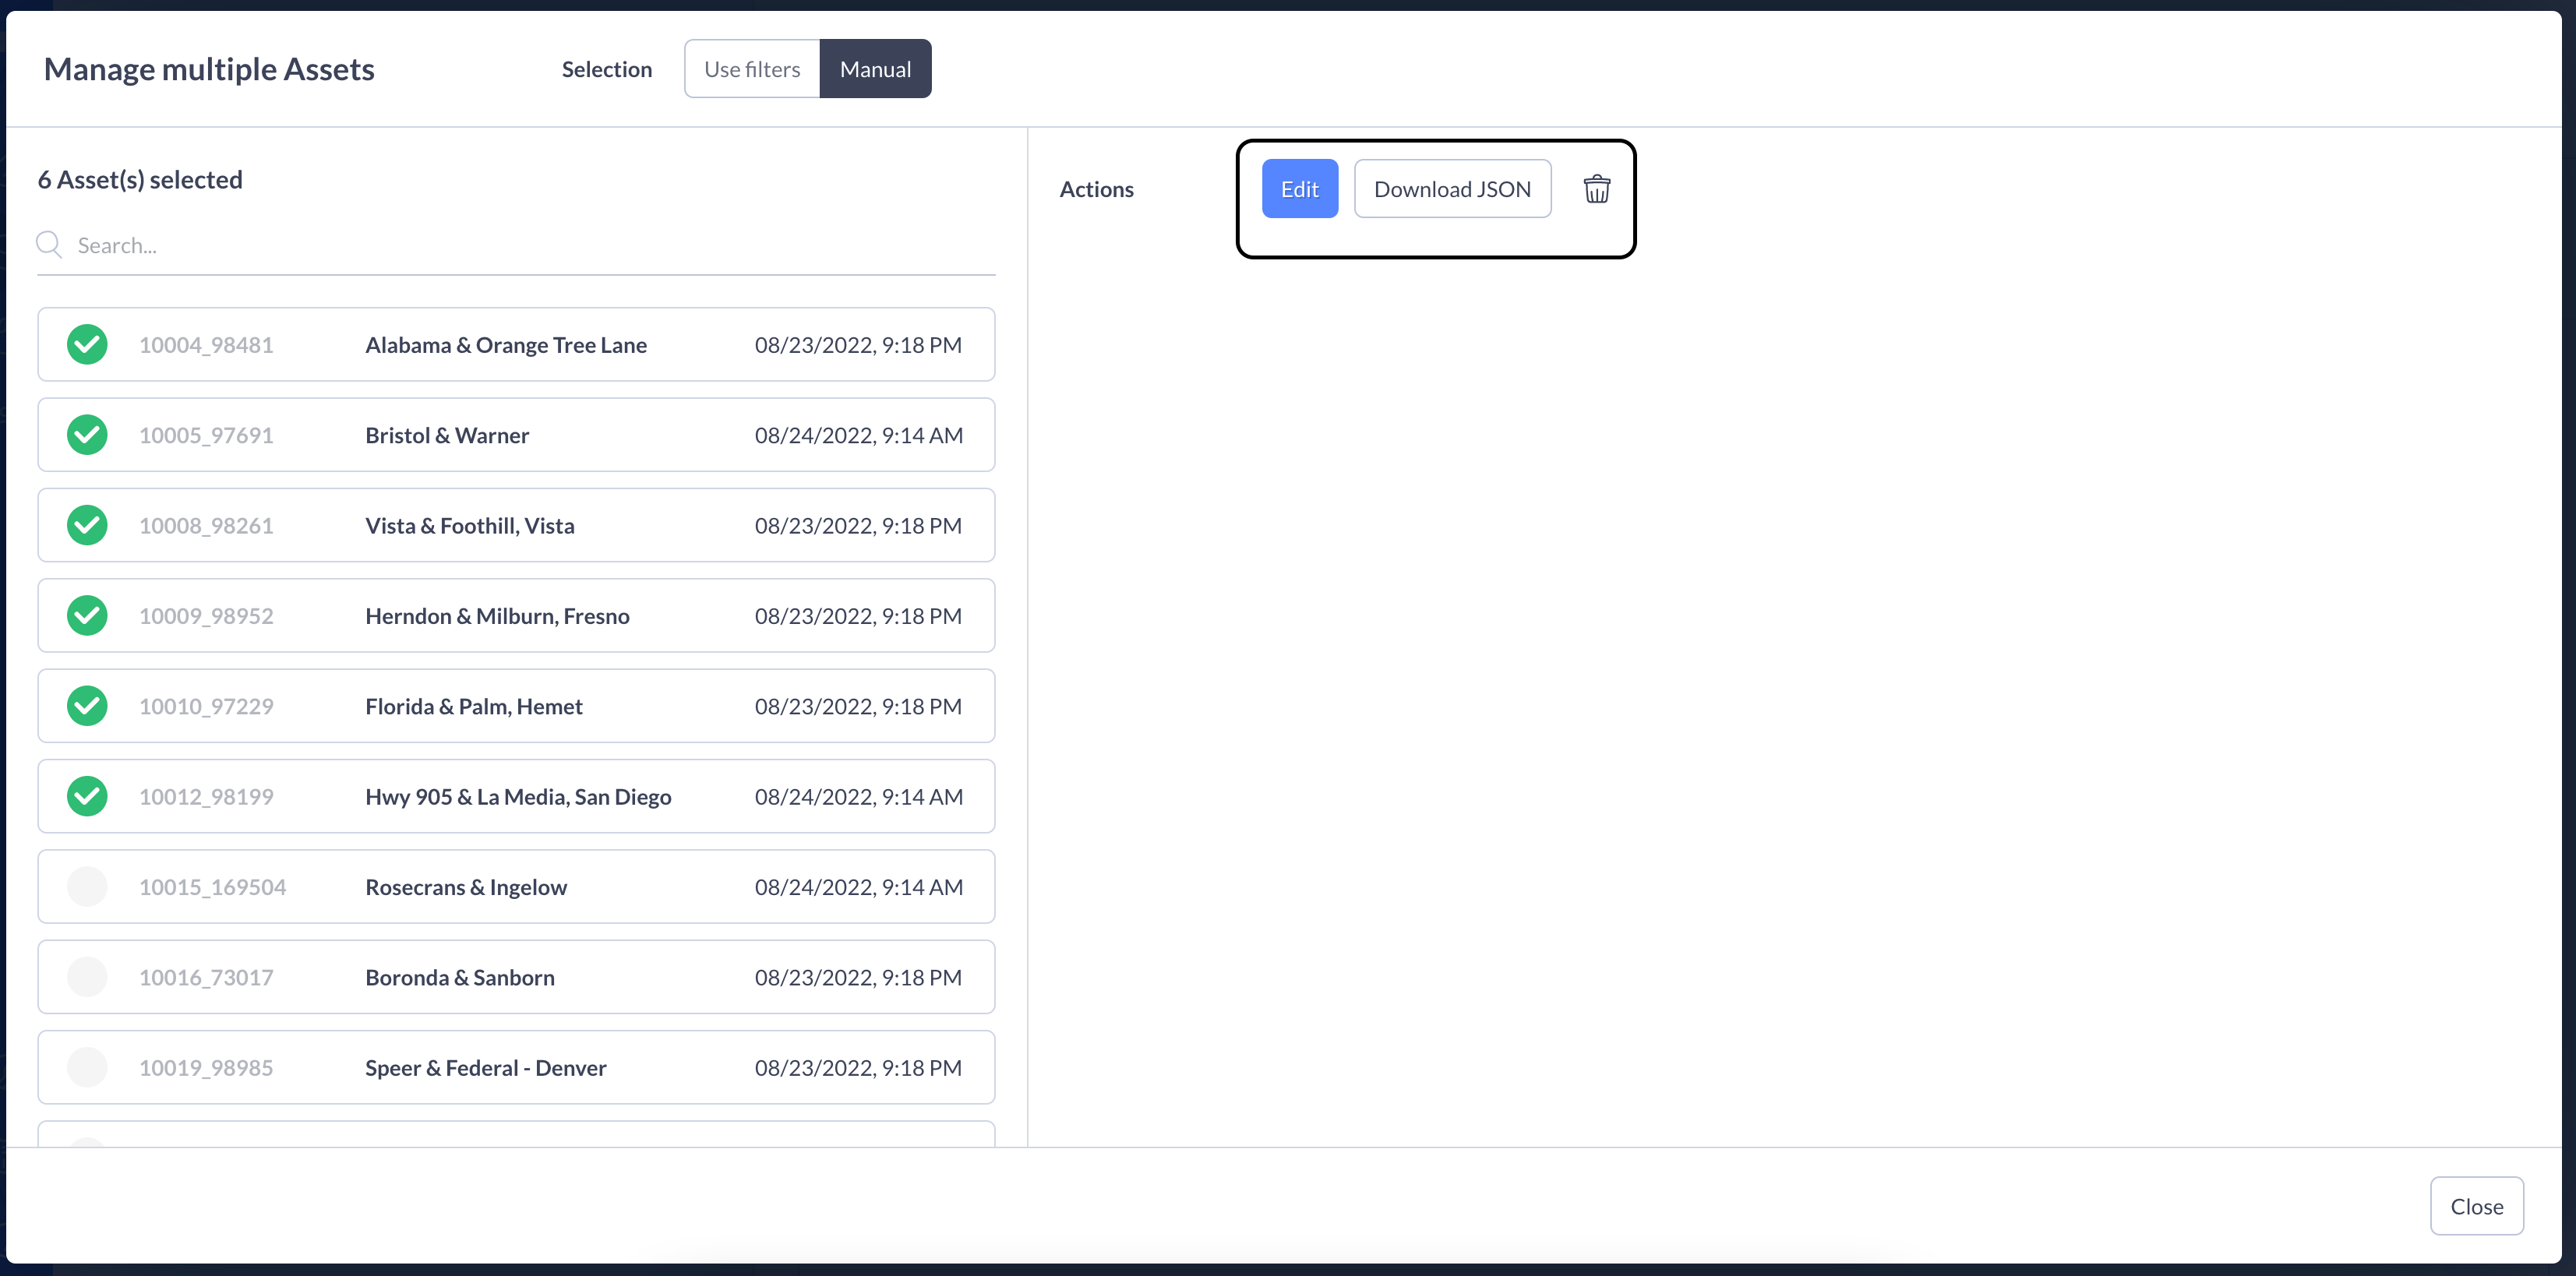
Assets multi selection and modification
- Open the multi selection modal

- Filter your asset list by Name, Id, City, Country code, Tags and Types
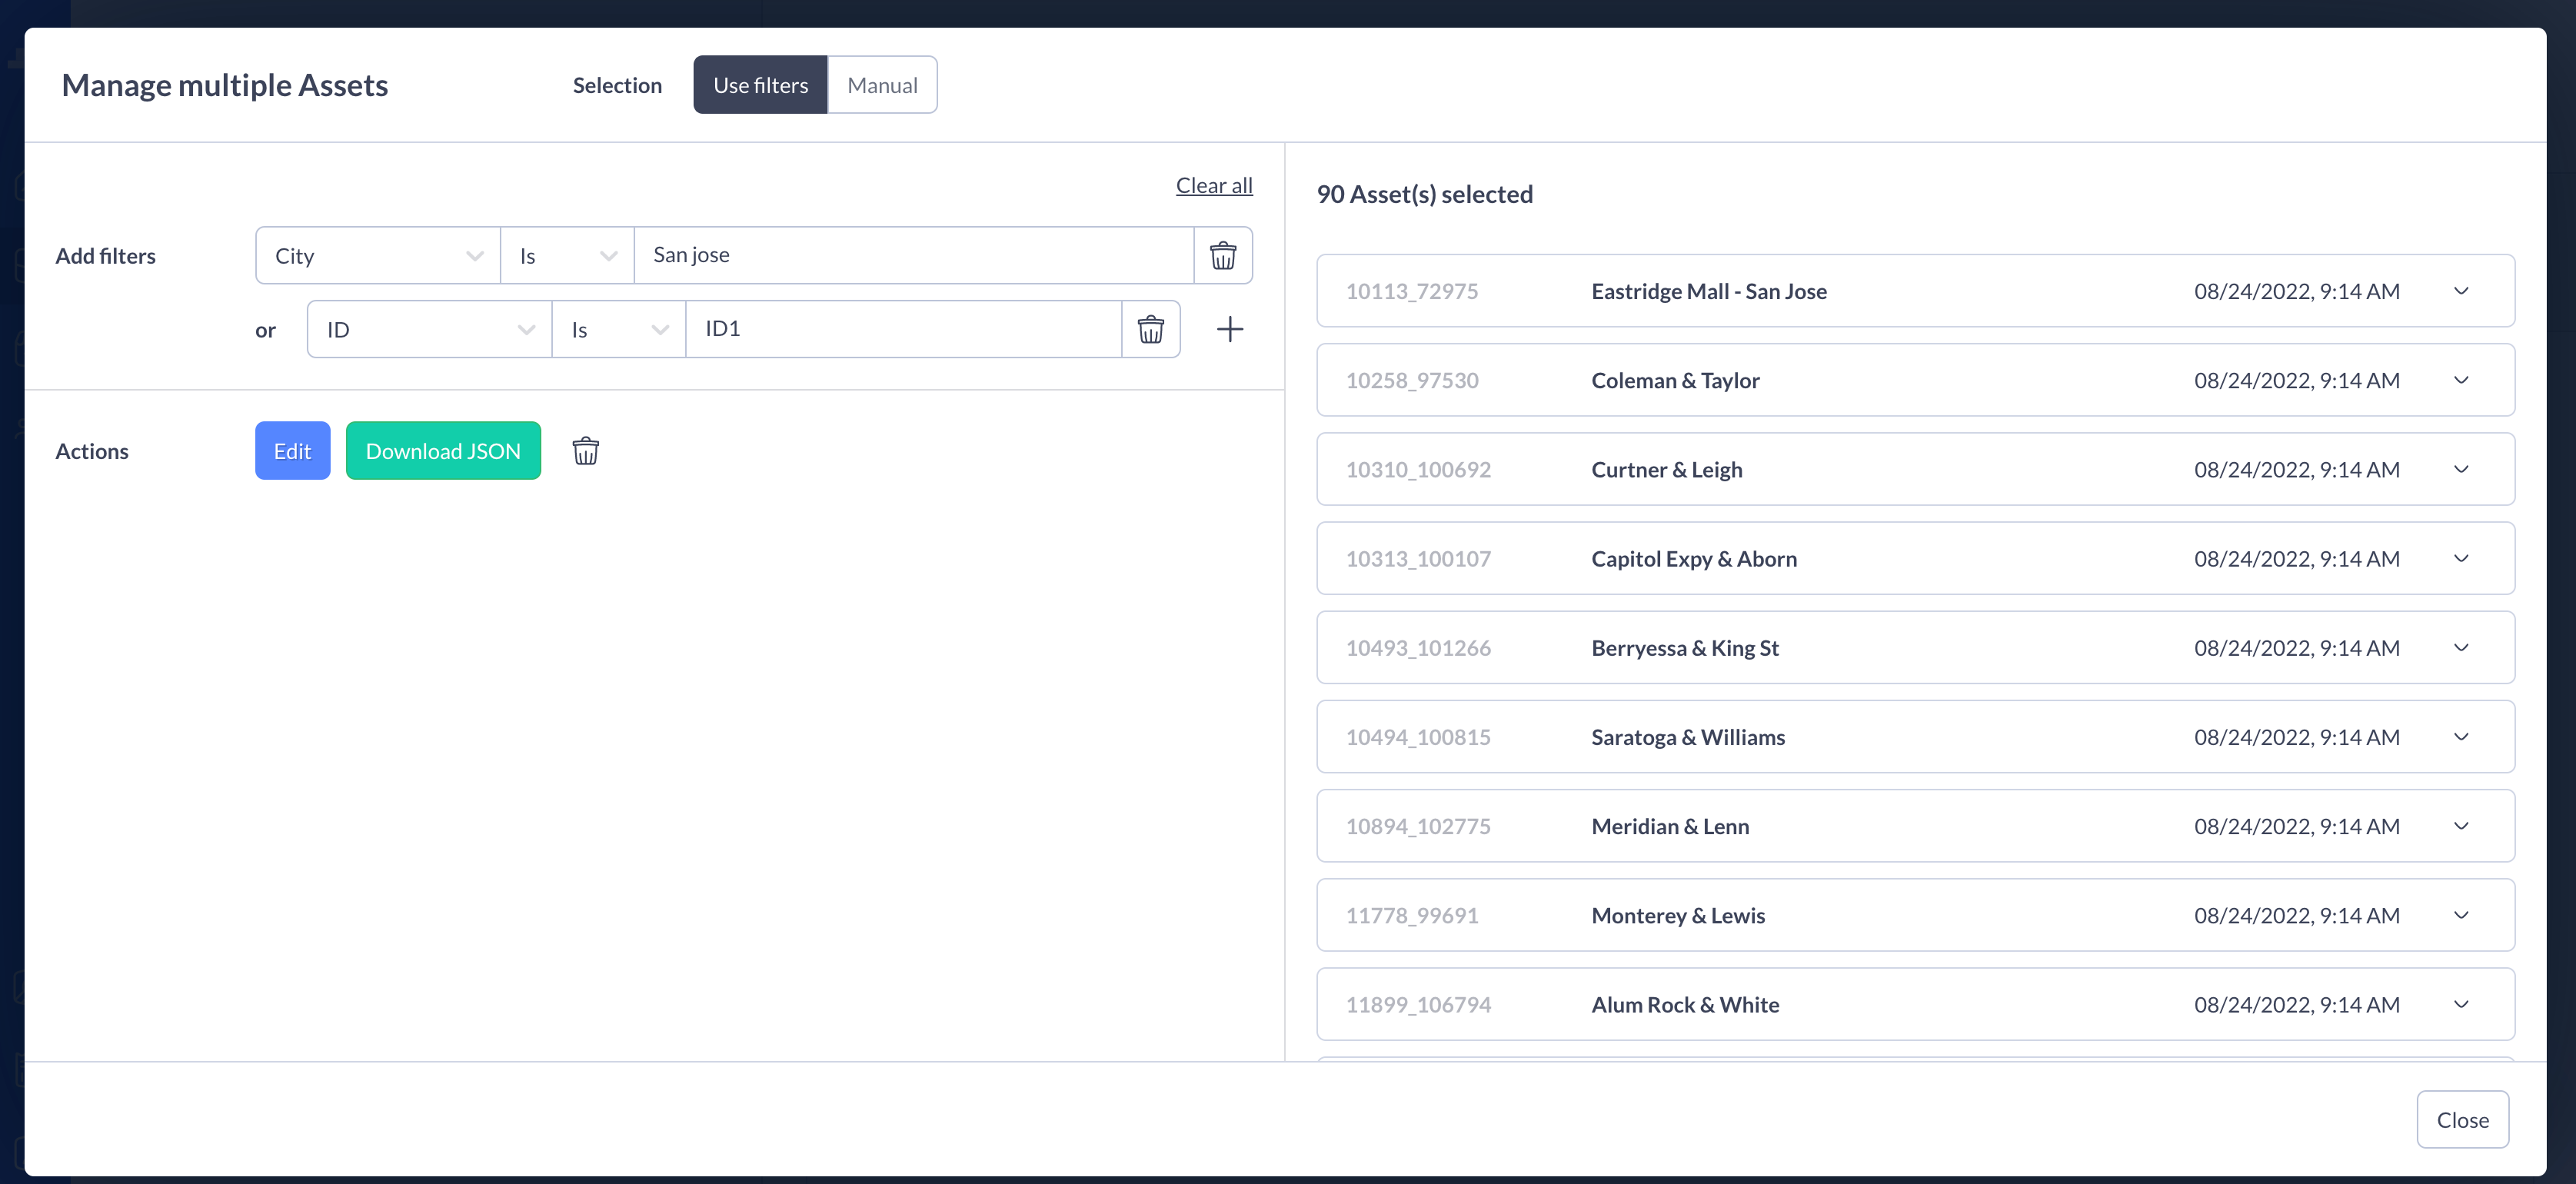
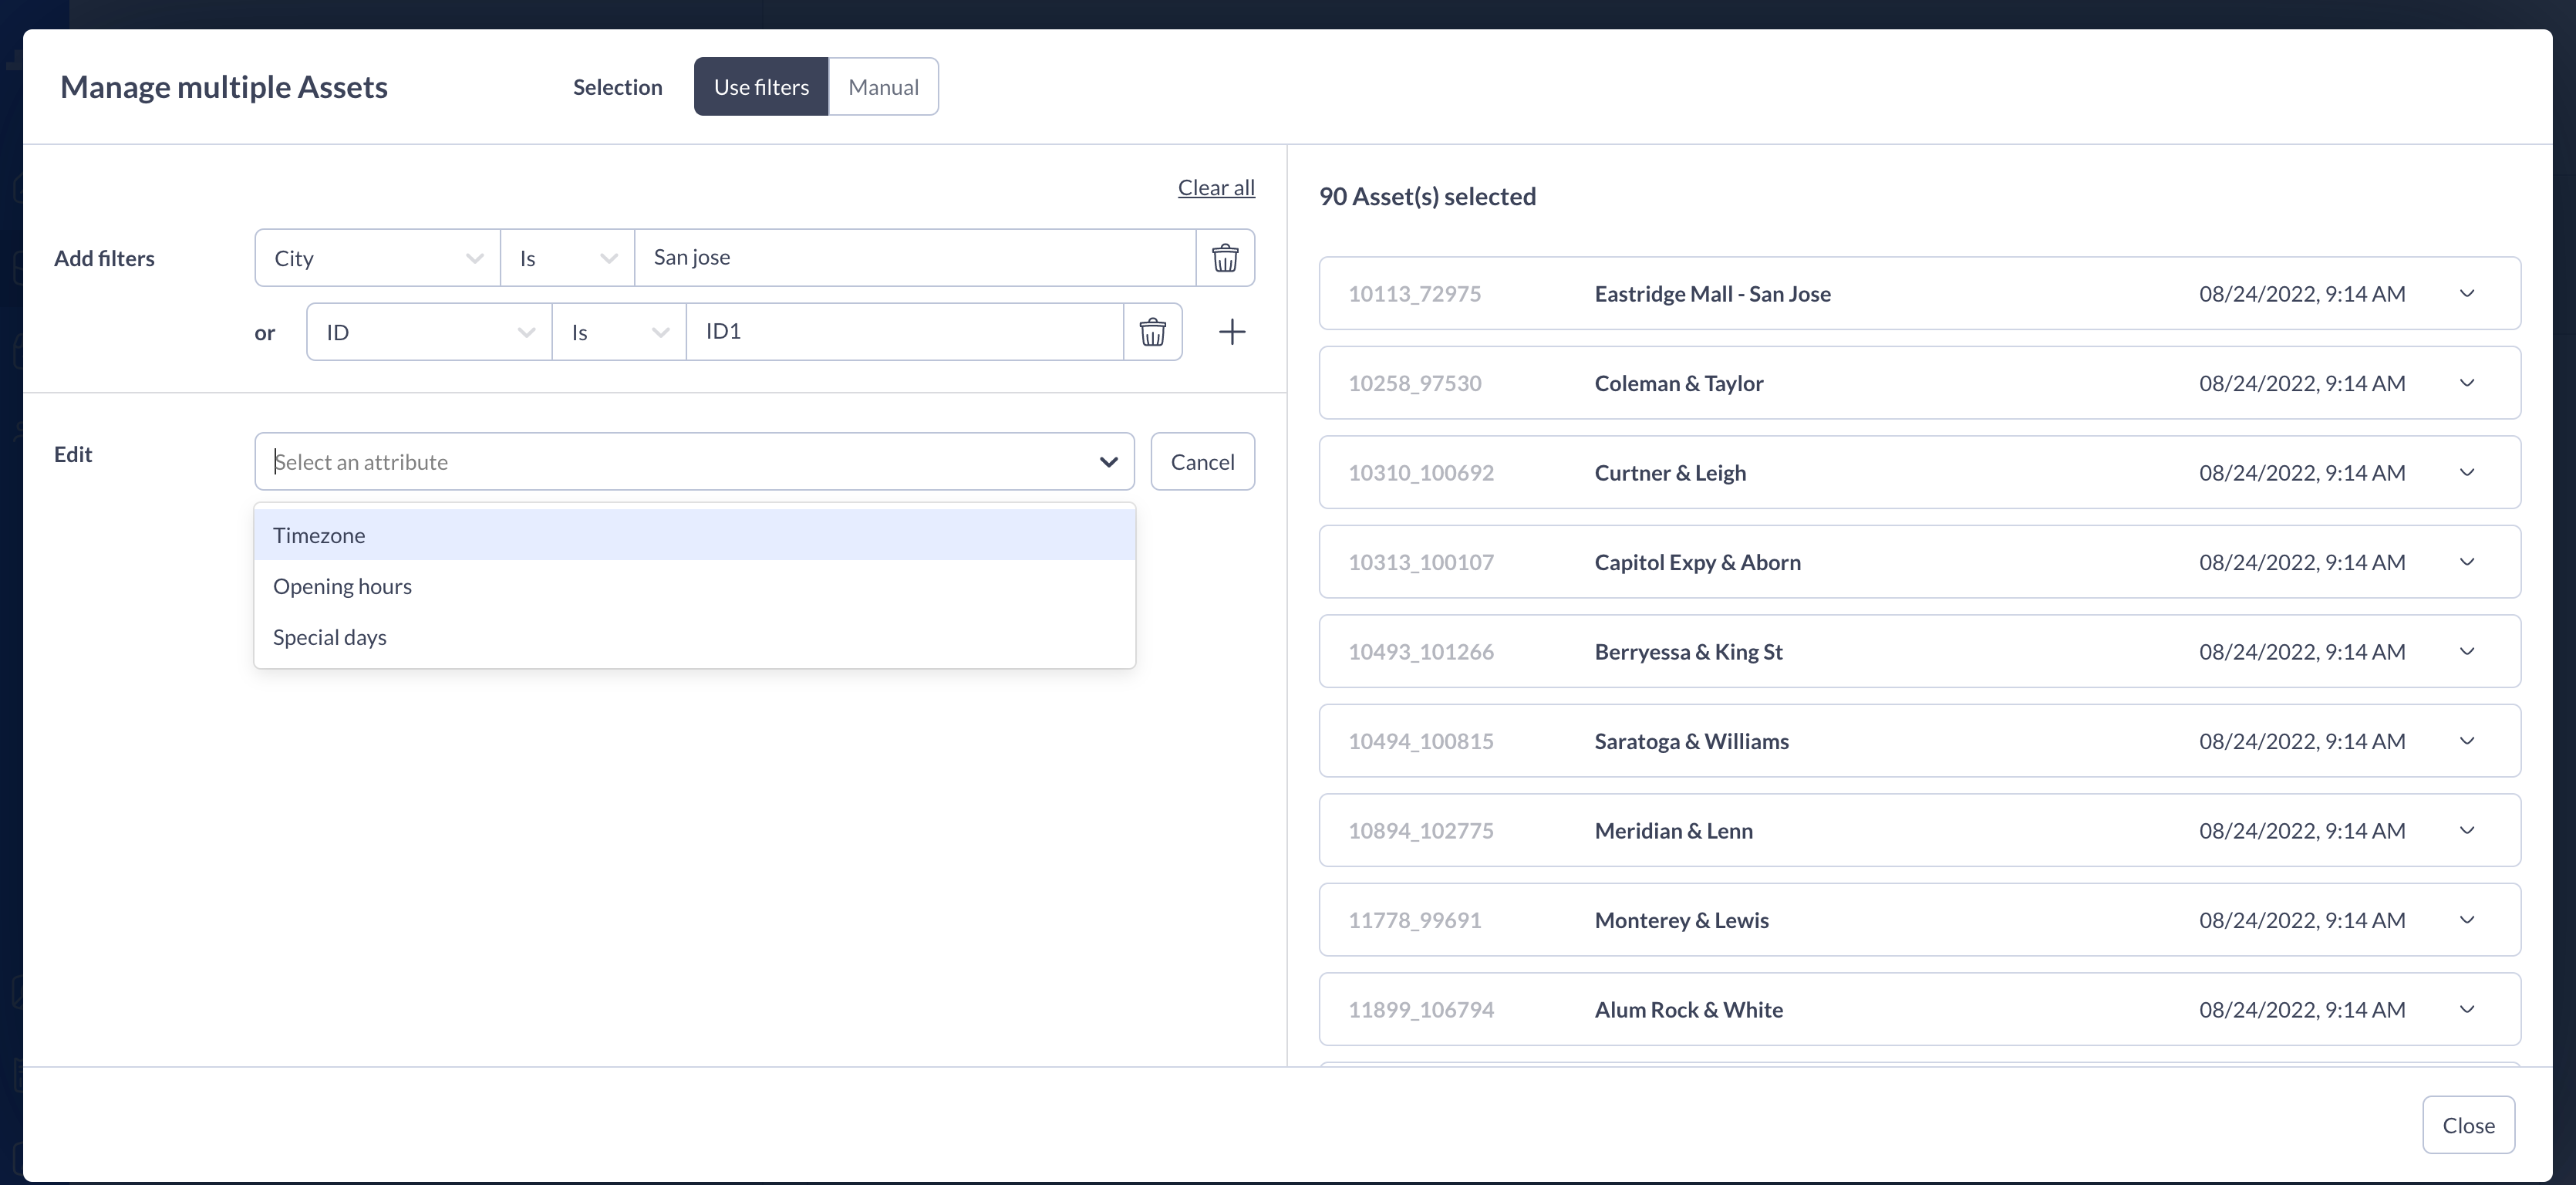
- Edit timezone, opening hours, special days of your filtered assets
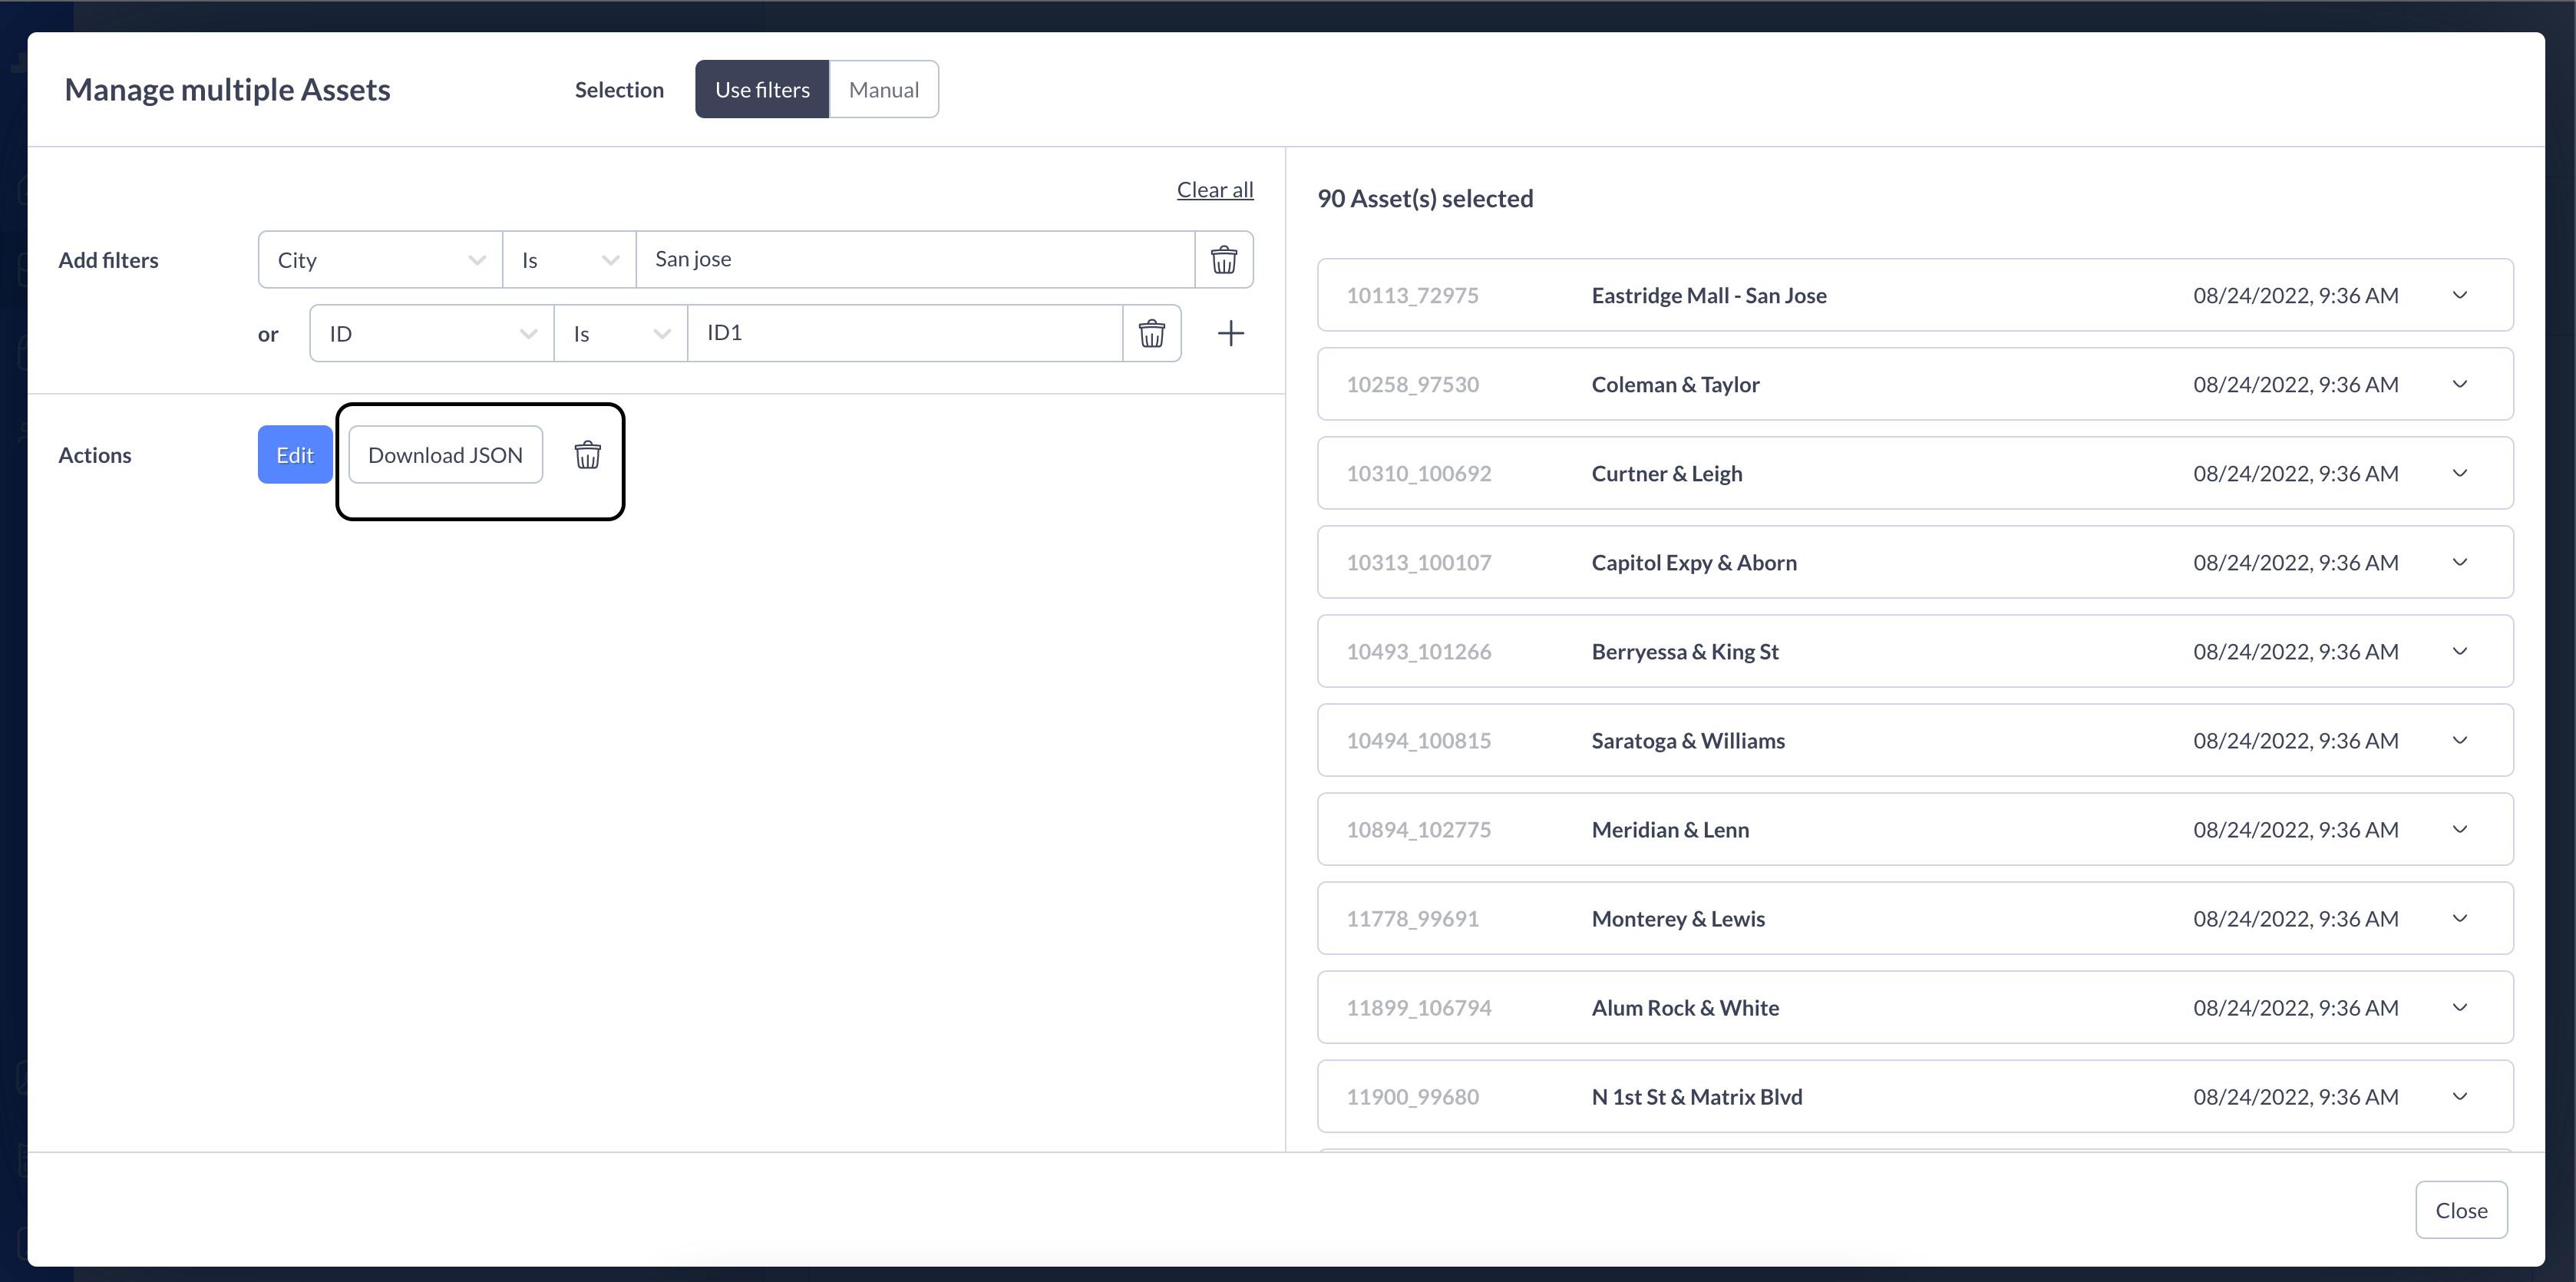
- Delete or download JSON file of your filtered assets
Manual Selection
- Click on the manual button on top of the modal

- Select manually your assets on the assets list

- Then you can edit, download json file or delete you assets selected manualy
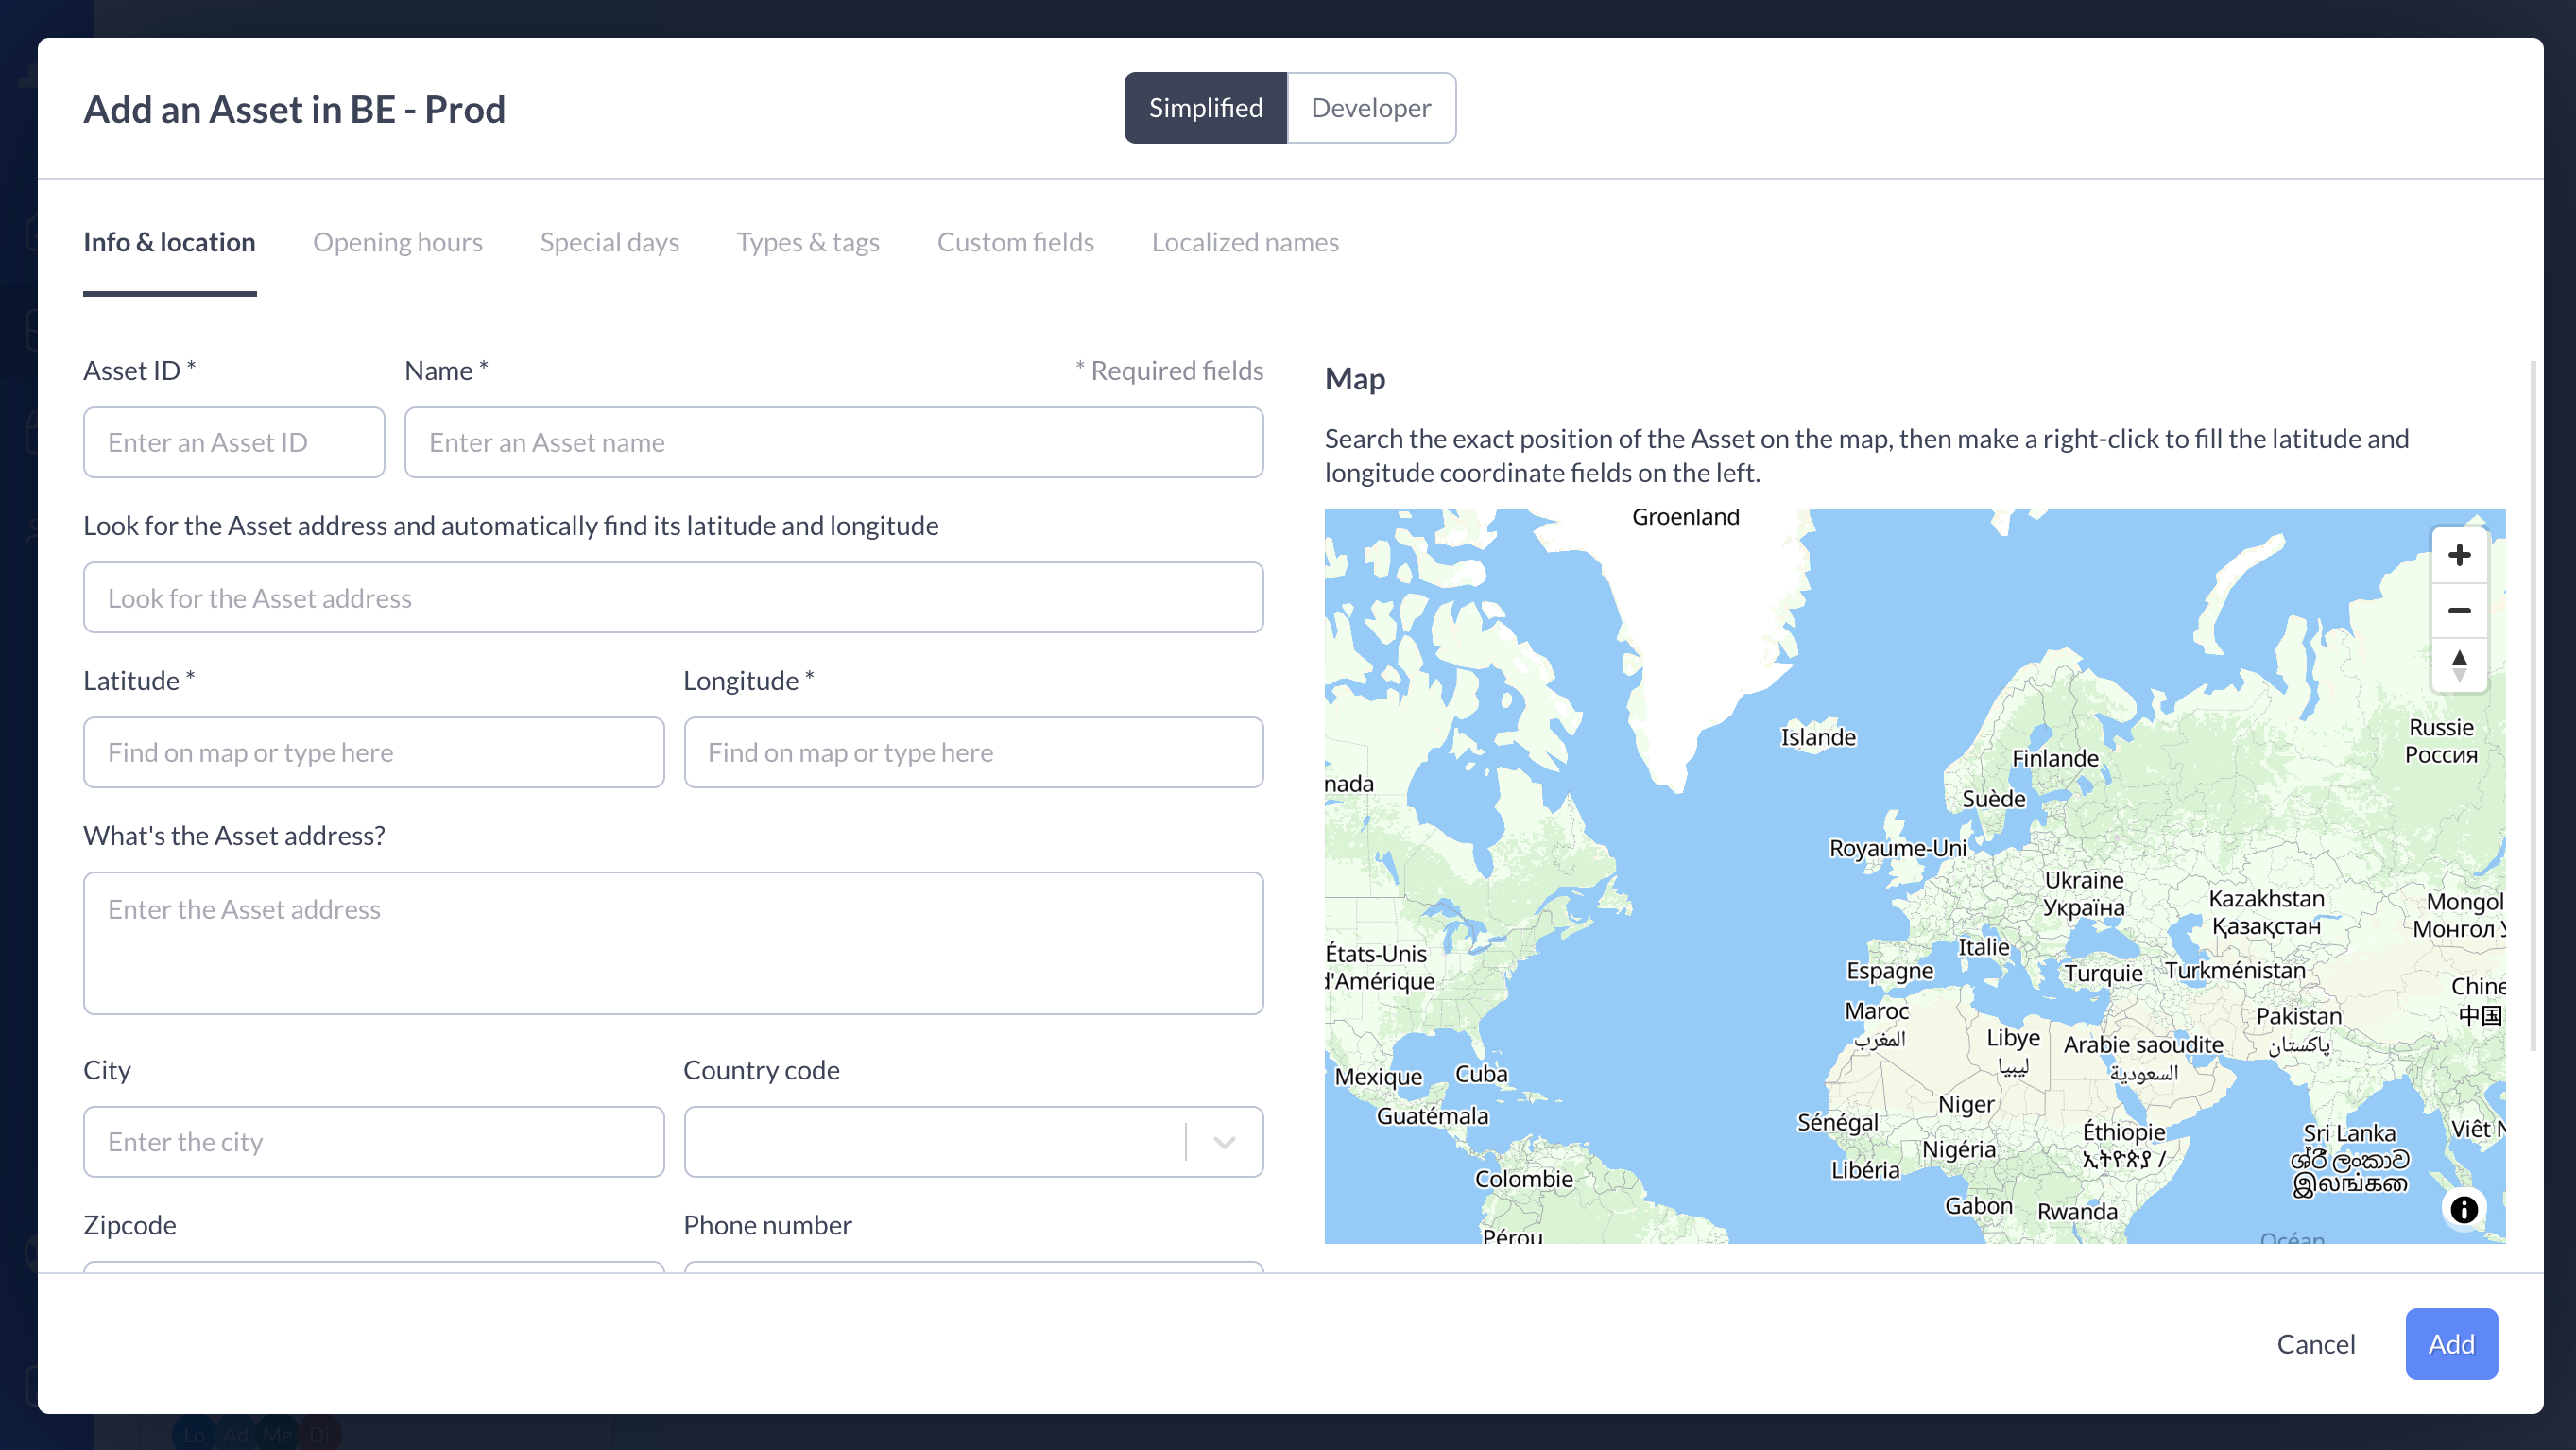
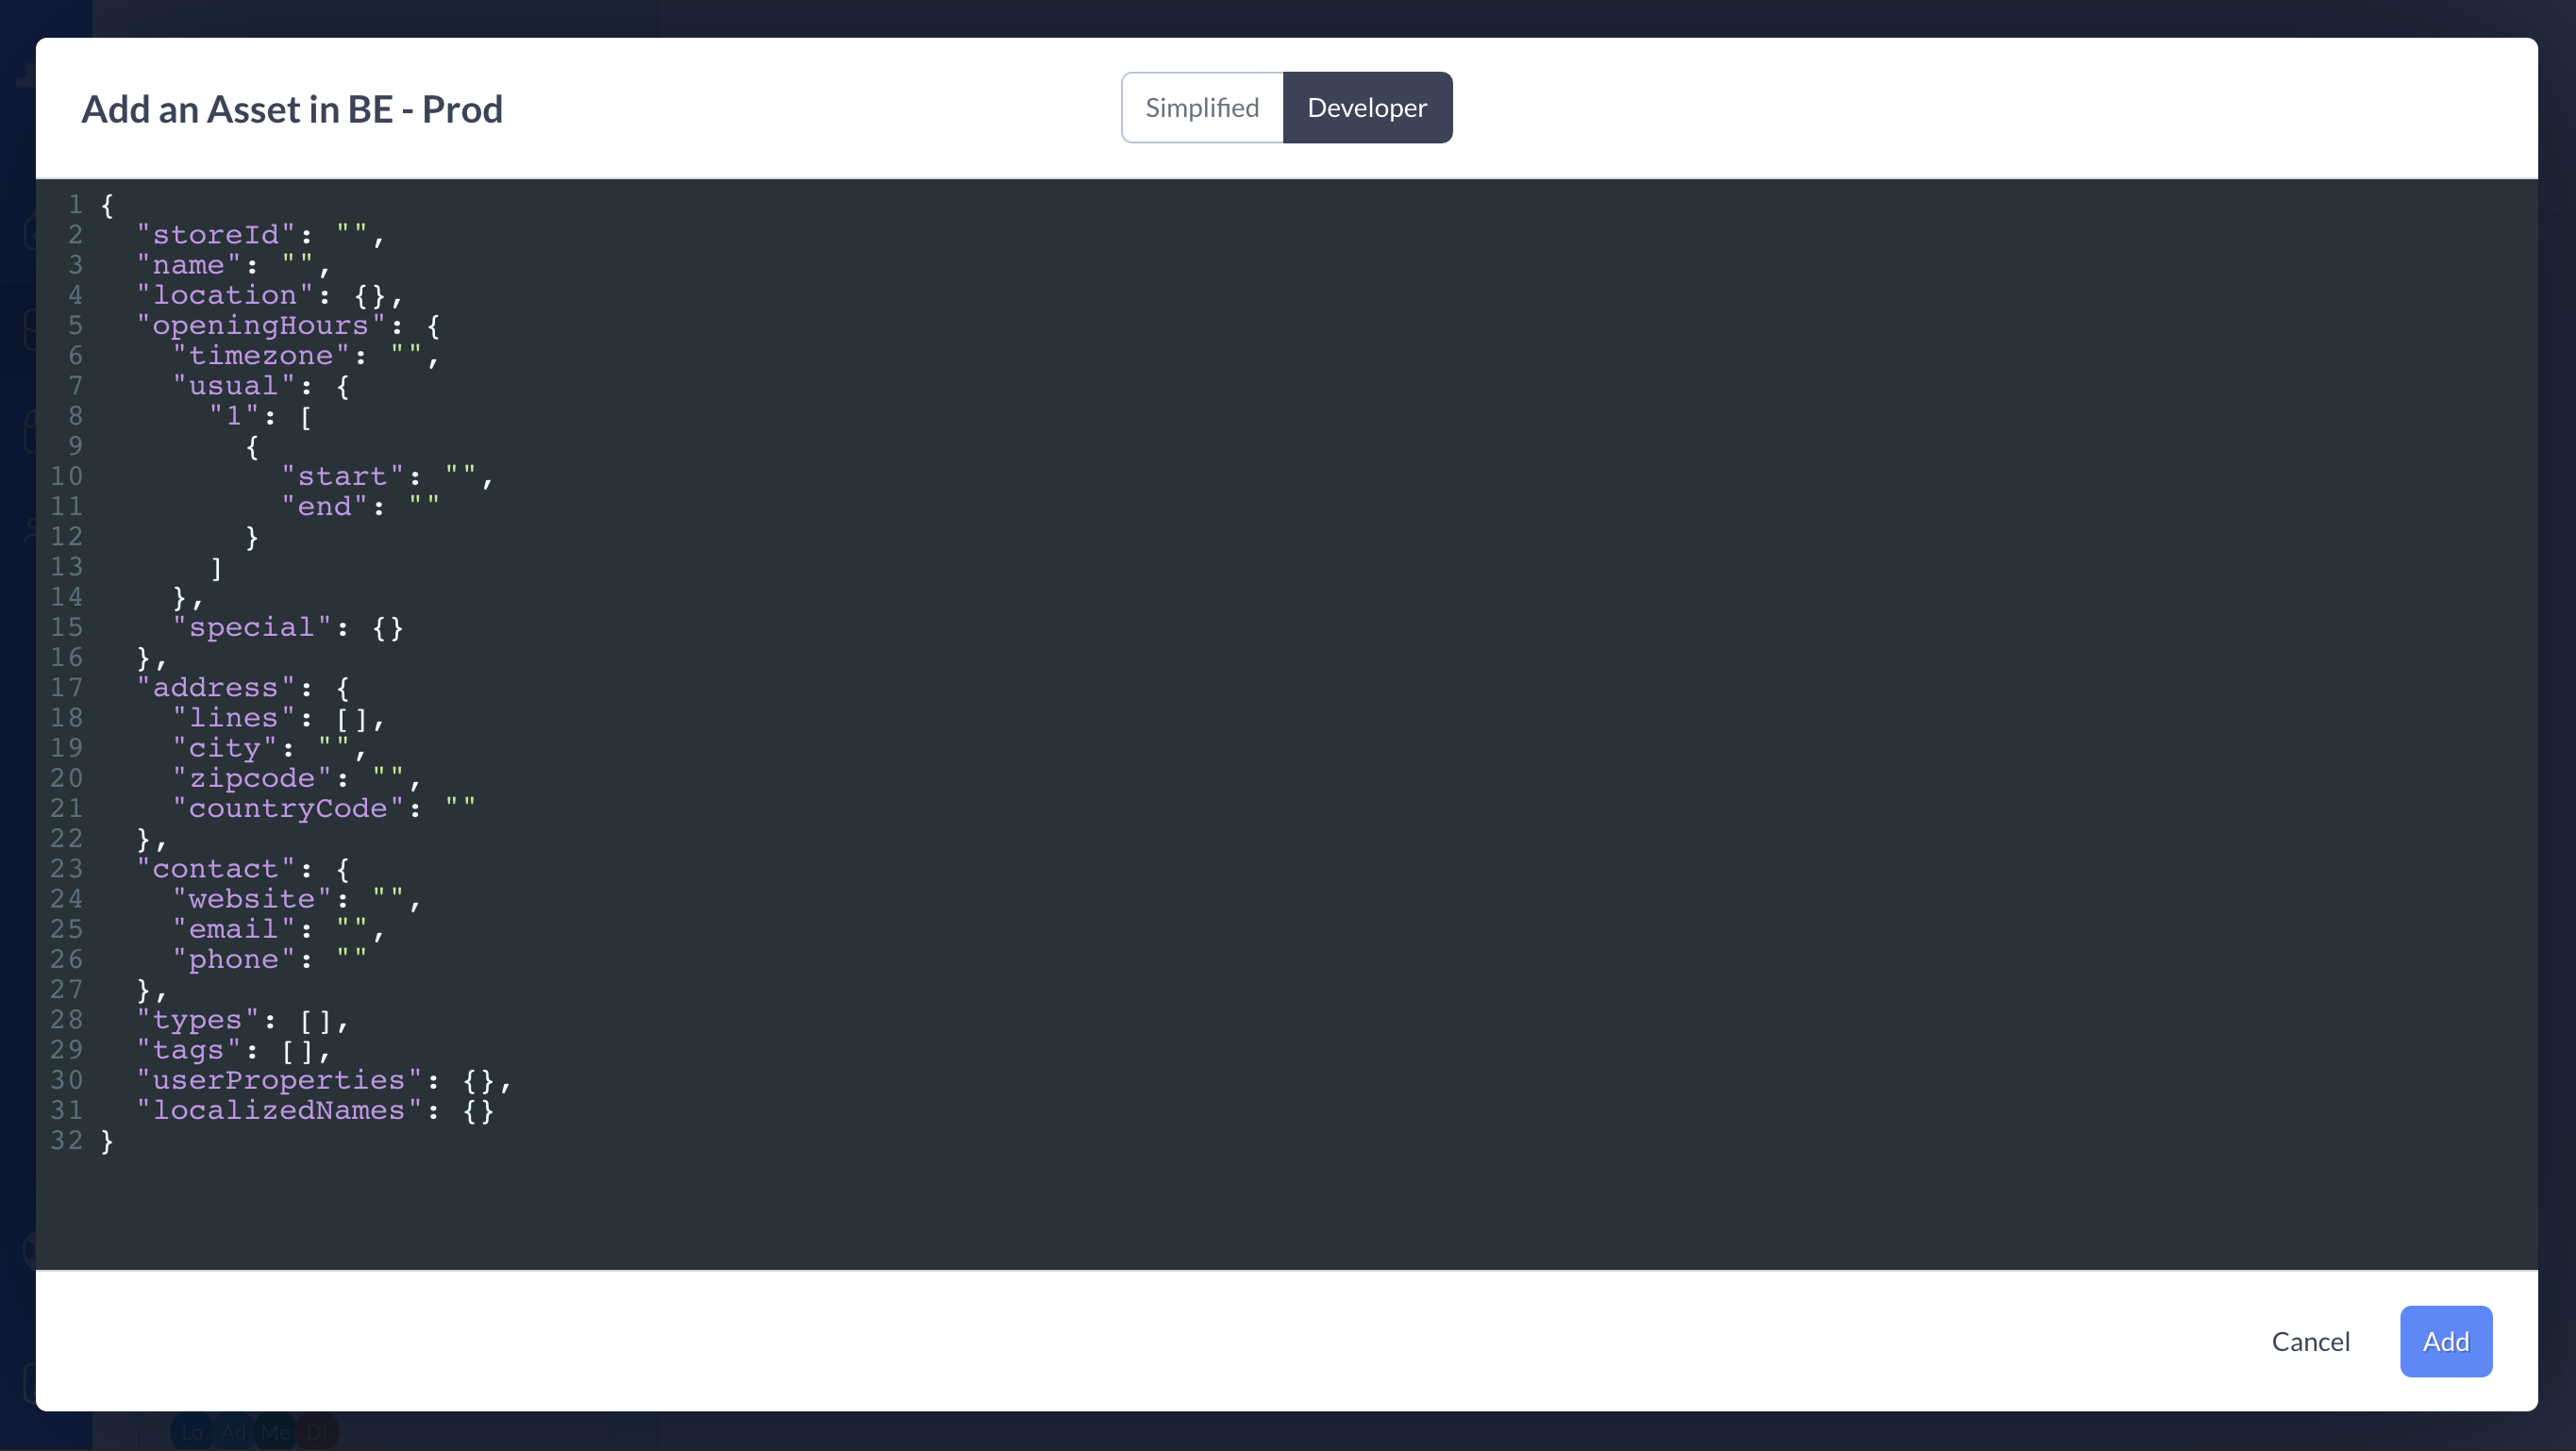
Asset creation & management
We have worked on simplifying the way you can create or update Assets in your Project, first and foremost to enable non-developers users to do it as well.
Now you have 2 ways of doing so:
- Filling the fields (Simplified view, for the Muggles)
- Copy/pasting or uploading json content (Developer view, for the IT-wizards)
Another nice thing that could be considered as sorcery: any modification you make either in the Simplified view or in the Developer view will magically be made in the other view.
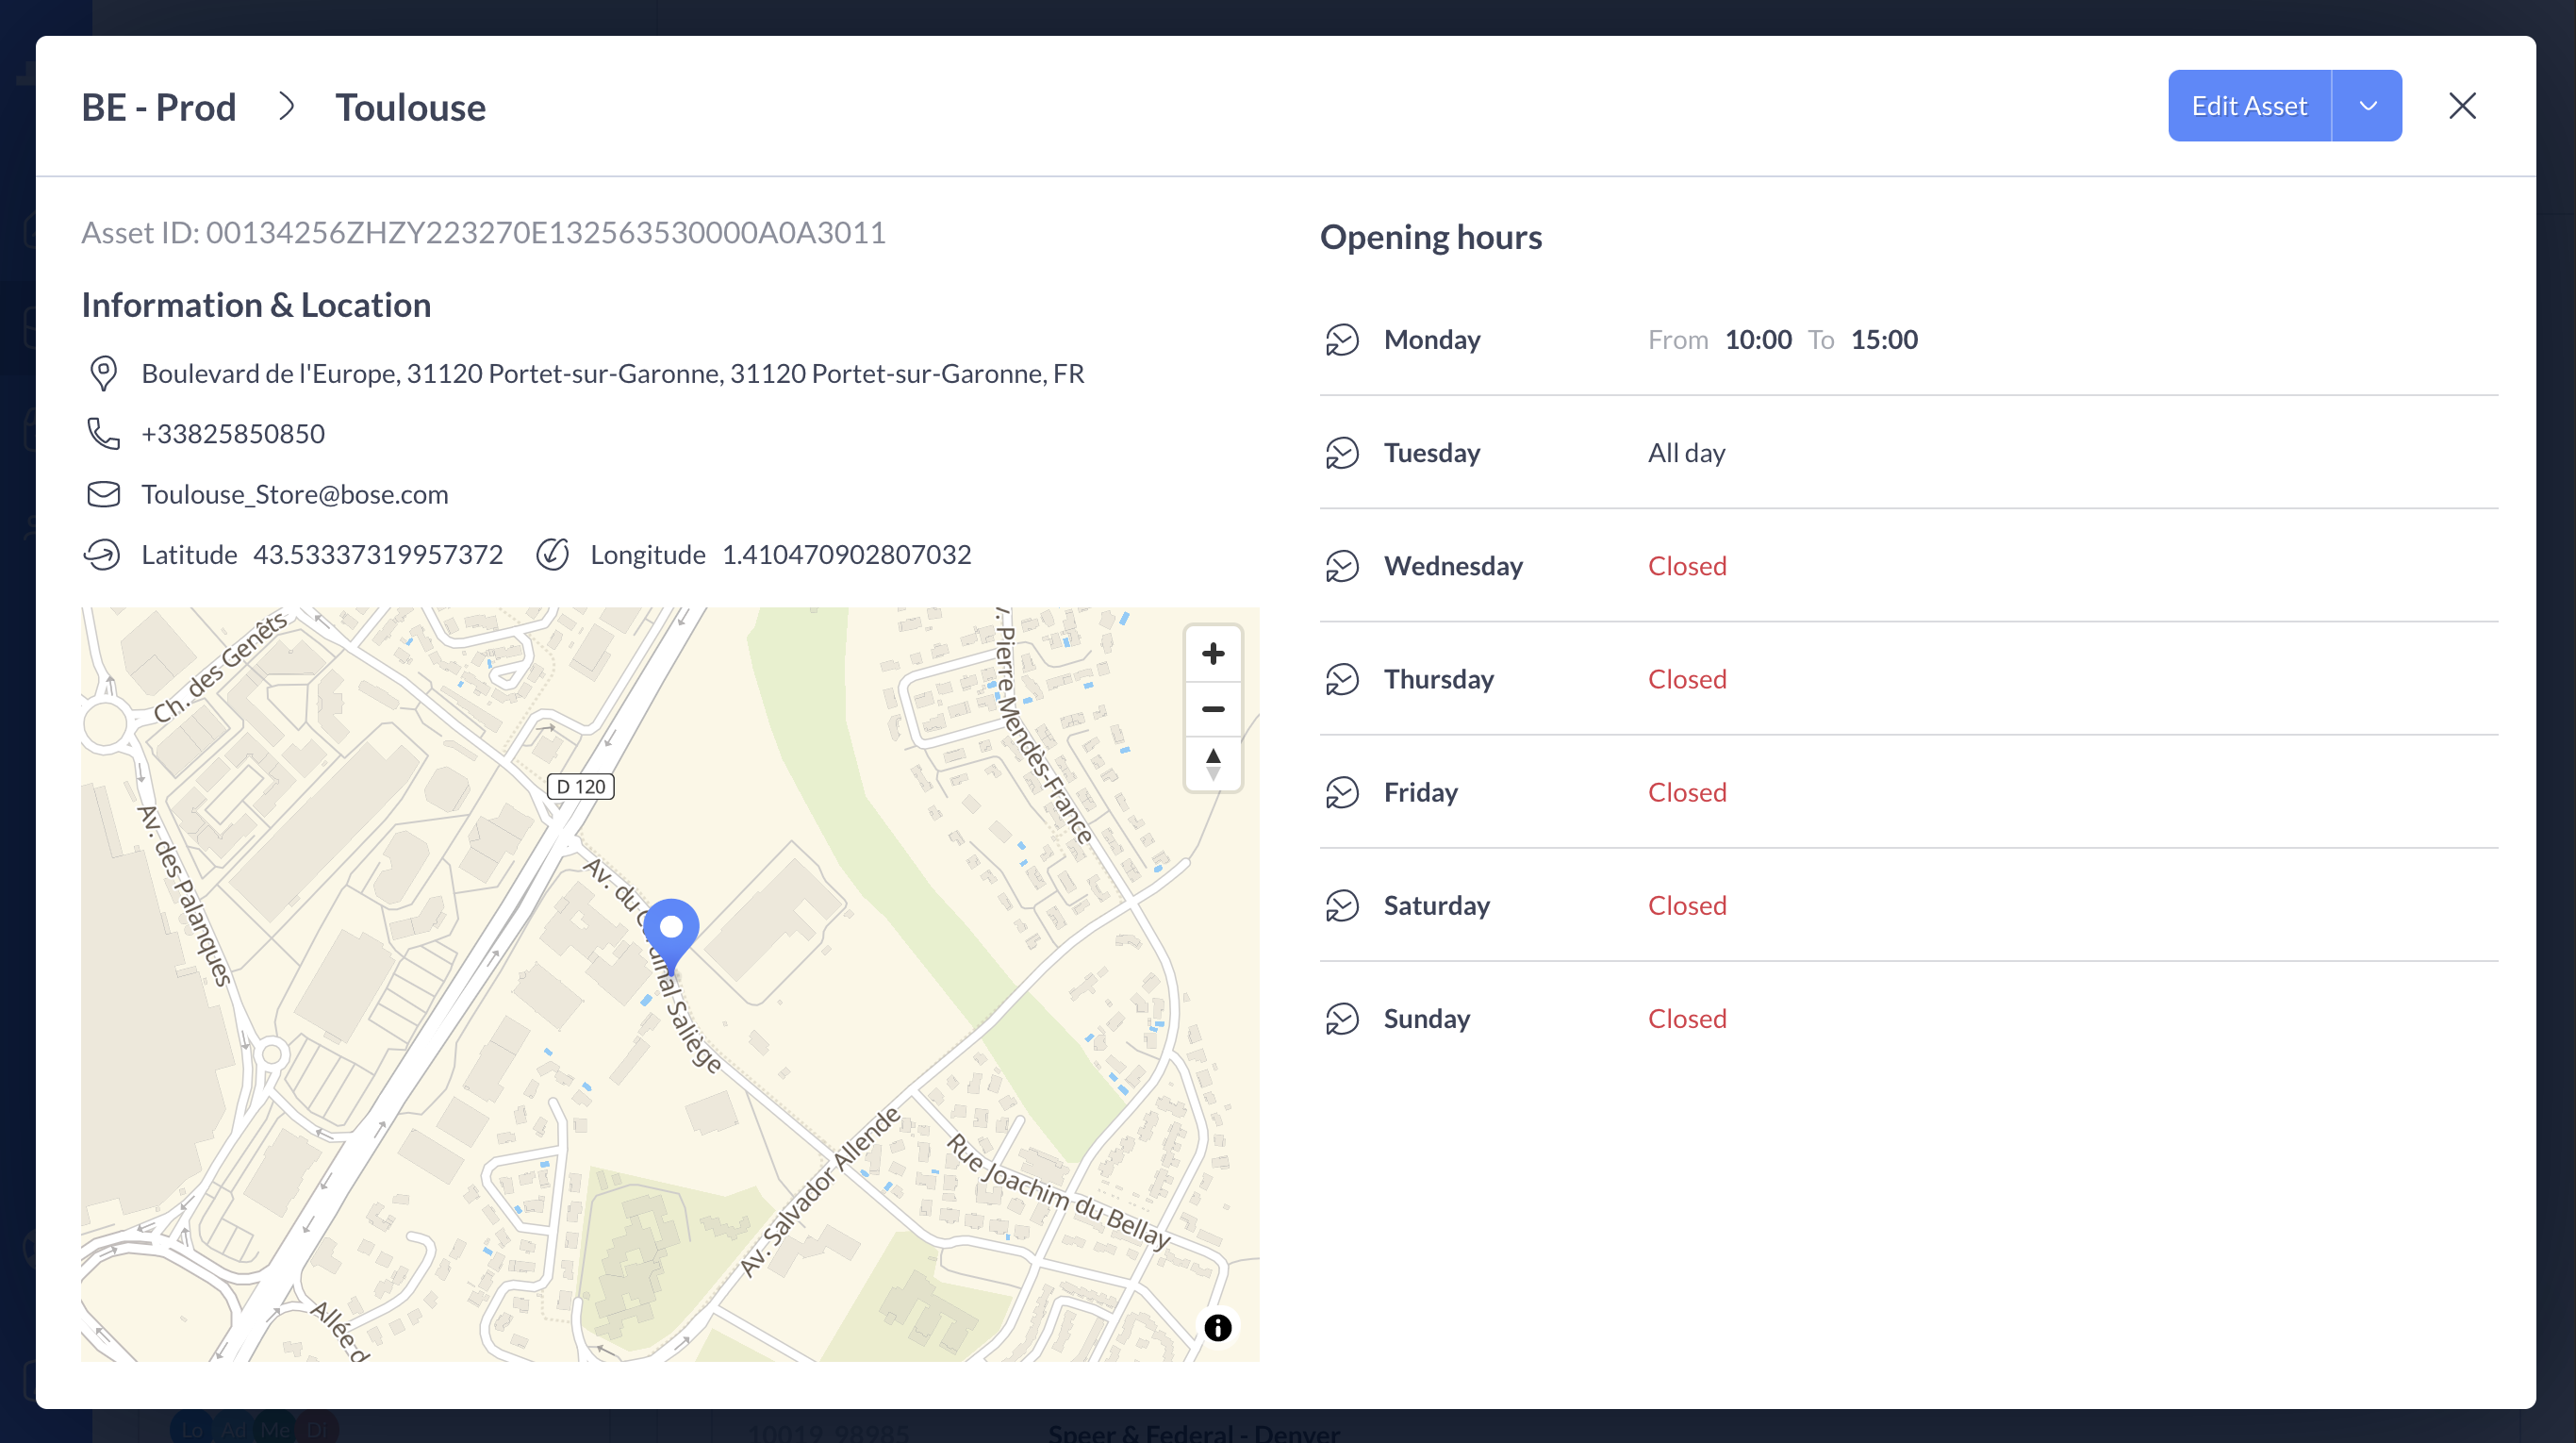
Asset particularities

An Asset is made of 6 sub-sections:
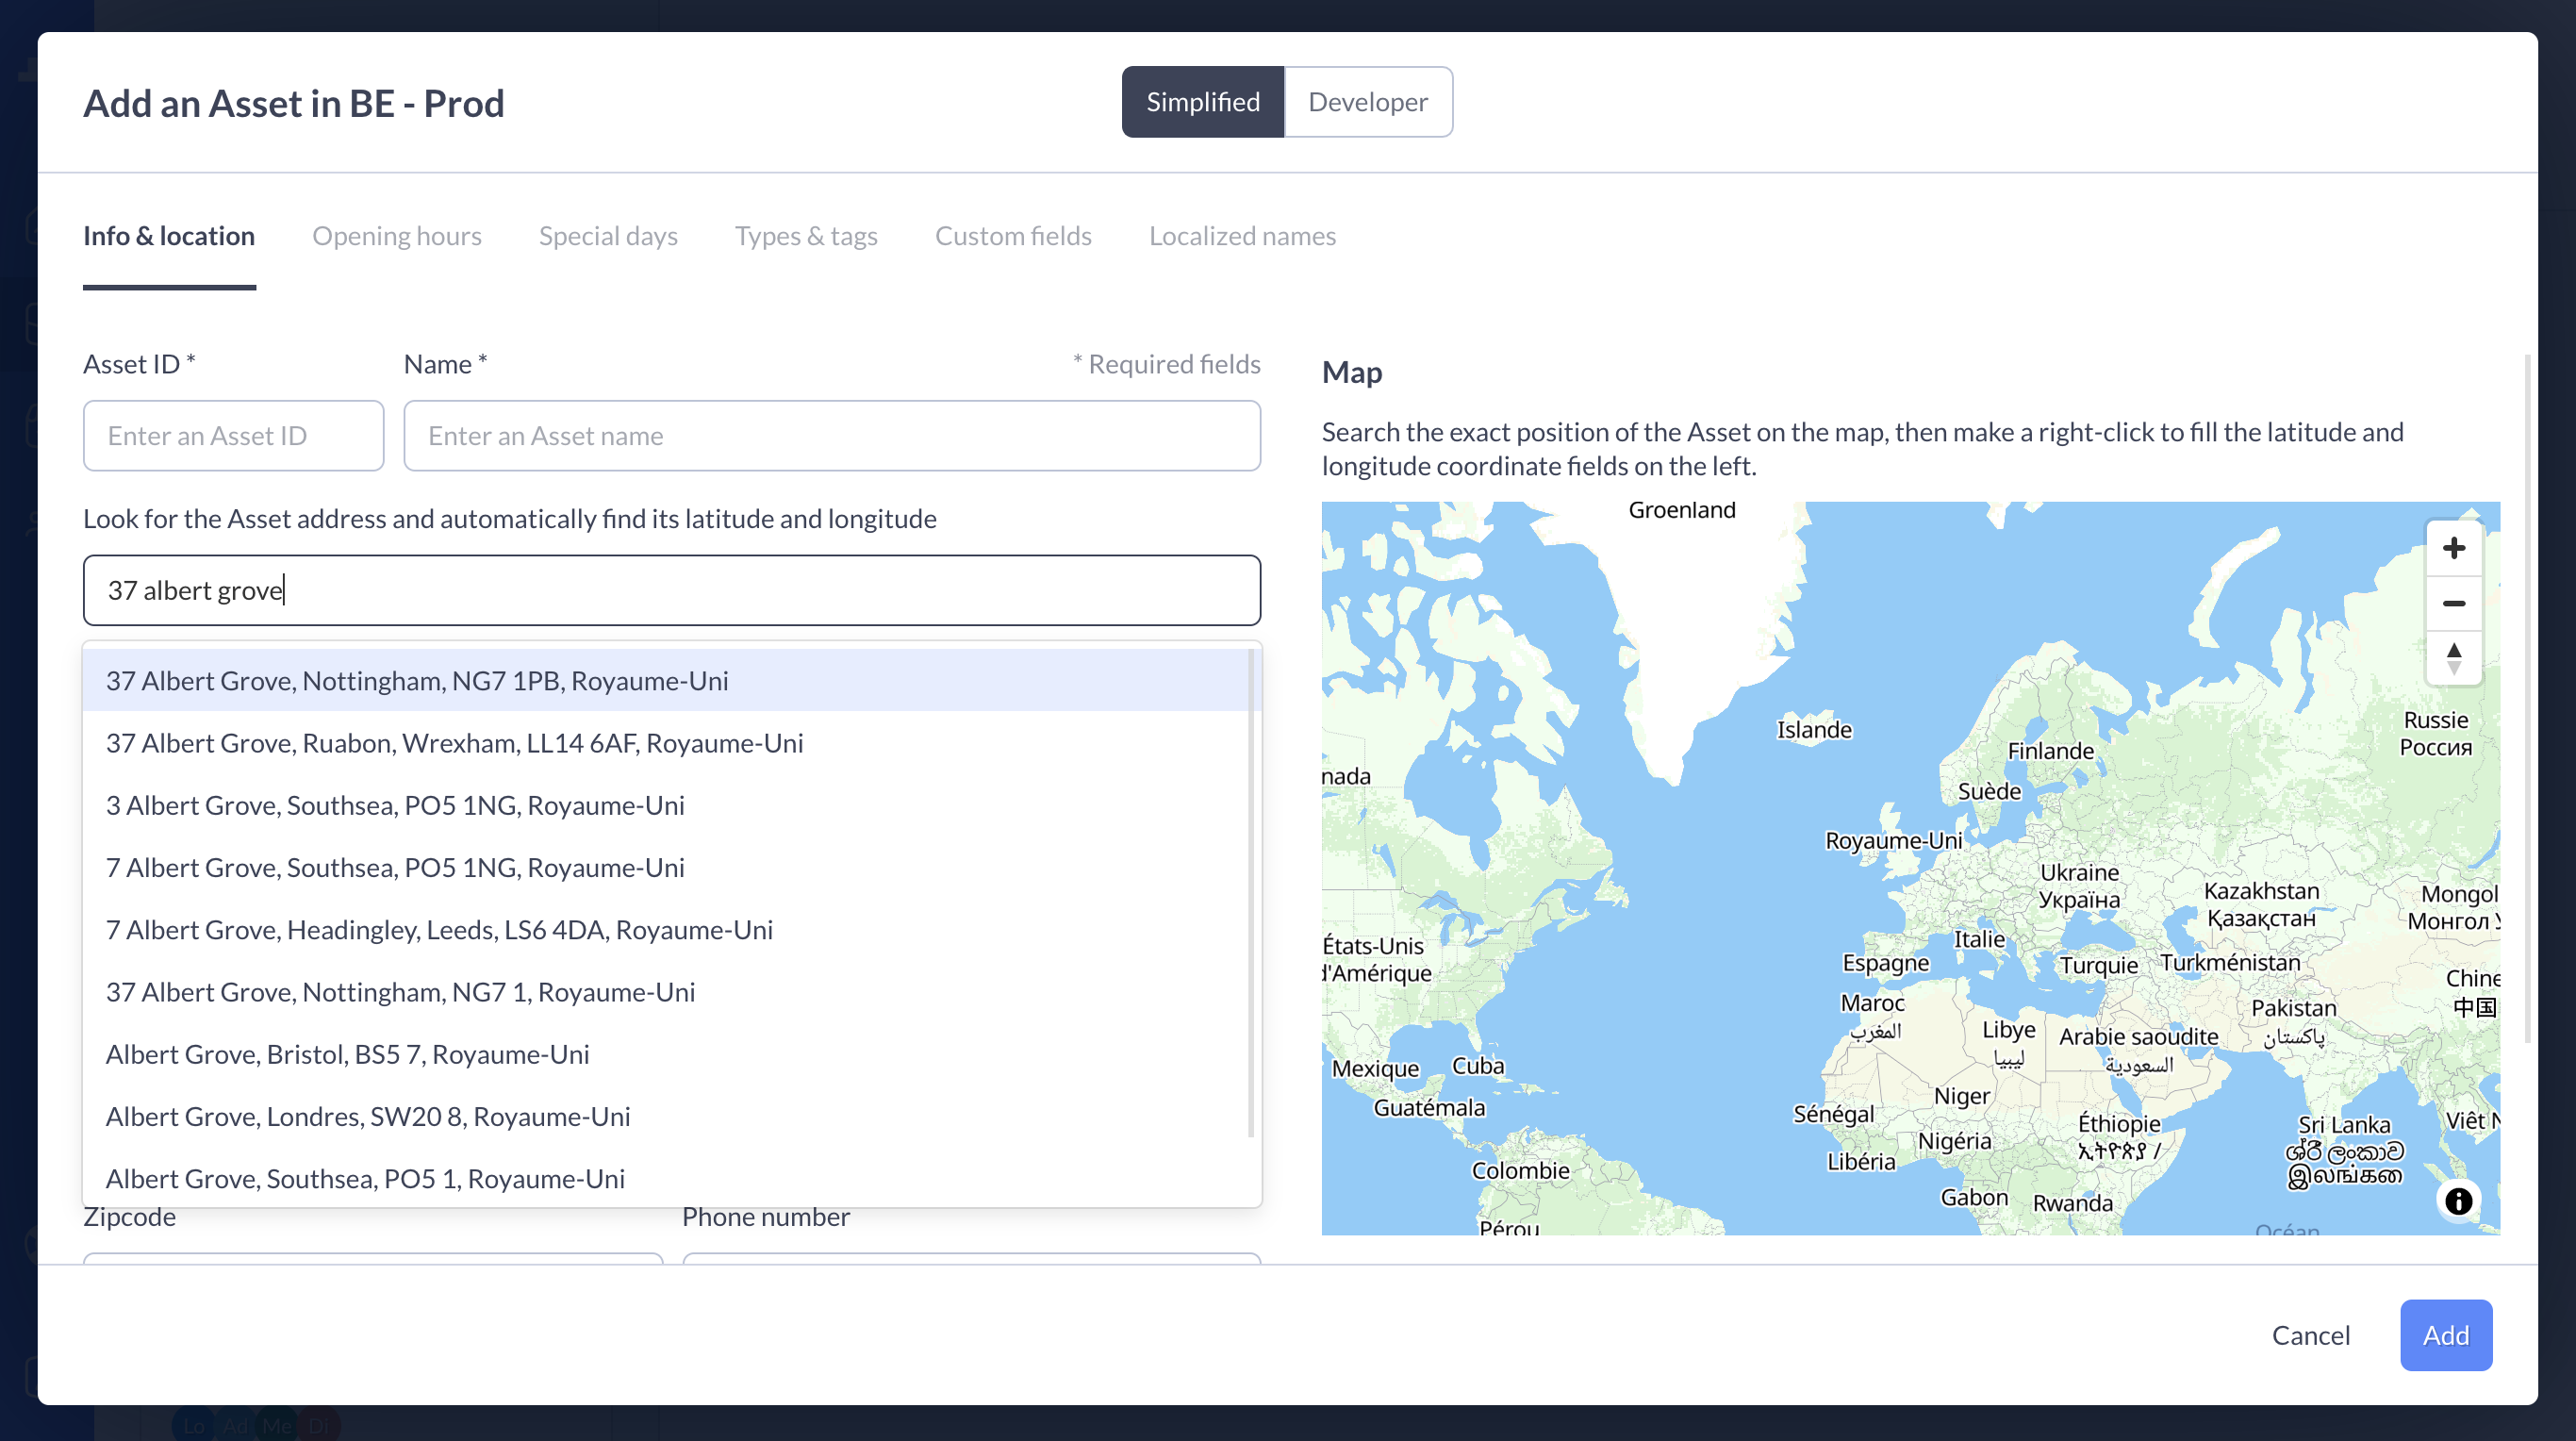
Info & location: where you configure your Asset's basic information and its 4 mandatory fields (latitude, longitude, name and storeId.)
Opening hours: where you configure your Asset's weekly routine, from Monday to Sunday. You can add several opening time periods within a day, which could for example look like this: shop opened From 8:30am to 10am & from 12pm to 3pm & from 6pm to 11pm (with screenshot). If you want to understand how Opening hours work, you can visit our Data Management API guide: Opening hours. You can now also easily switch between the "All Day" and "custom hours" options!
Special days: where you can add special opening hours for days in particular such as bank holidays.
Types & Tags: which two distincts ways of grouping several Assets together and enable your users filter their search thanks to those. Common tags or types could be Wi-Fi, parking, self-service, and so on. If you want to learn how to configure tags and types in your Store Locator Widget, you can visit ouStore Locator Widget guide: Configuration.
Custom fields: If you wish to dive deeper in what the Woosmap Assets can bring you, you can configure custom fields that will be useful in your Store Locator Widget or Store Locator JS library.
Localized names: You can define alternate names for your Assets. These localized names are useful for multi-language integrations. Combined with our Autocomplete API endpoint you can let your users find your store in their native language.